If you're from Central Kentucky you're most likely familiar with snappy beer cheese, a spicy, flavorful cheese spread that's somewhat unique to the area. My first memories of the spread are from our family going to Hall's on the River just outside Lexington in Winchester Kentucky. Our whole extended family would gather there for dinners several times a summer, and we always had their beer cheese. Over time Hall's declined (but I'm told has rebounded since I moved away in the 90's) so we found other sources for beer cheese. For the last 15 years or so a friend of my parents would make large batches of her family recipe beer cheese and sell it to friends in 10 pound buckets, which would then be divvied up amongst us. She kept the recipe close to the vest, all I know is that she used a spreadable processed cheese and added flavorings. The standard flavorings are worcestershire sauce, garlic, cayenne (or tabasco), mustard and (of course) beer.
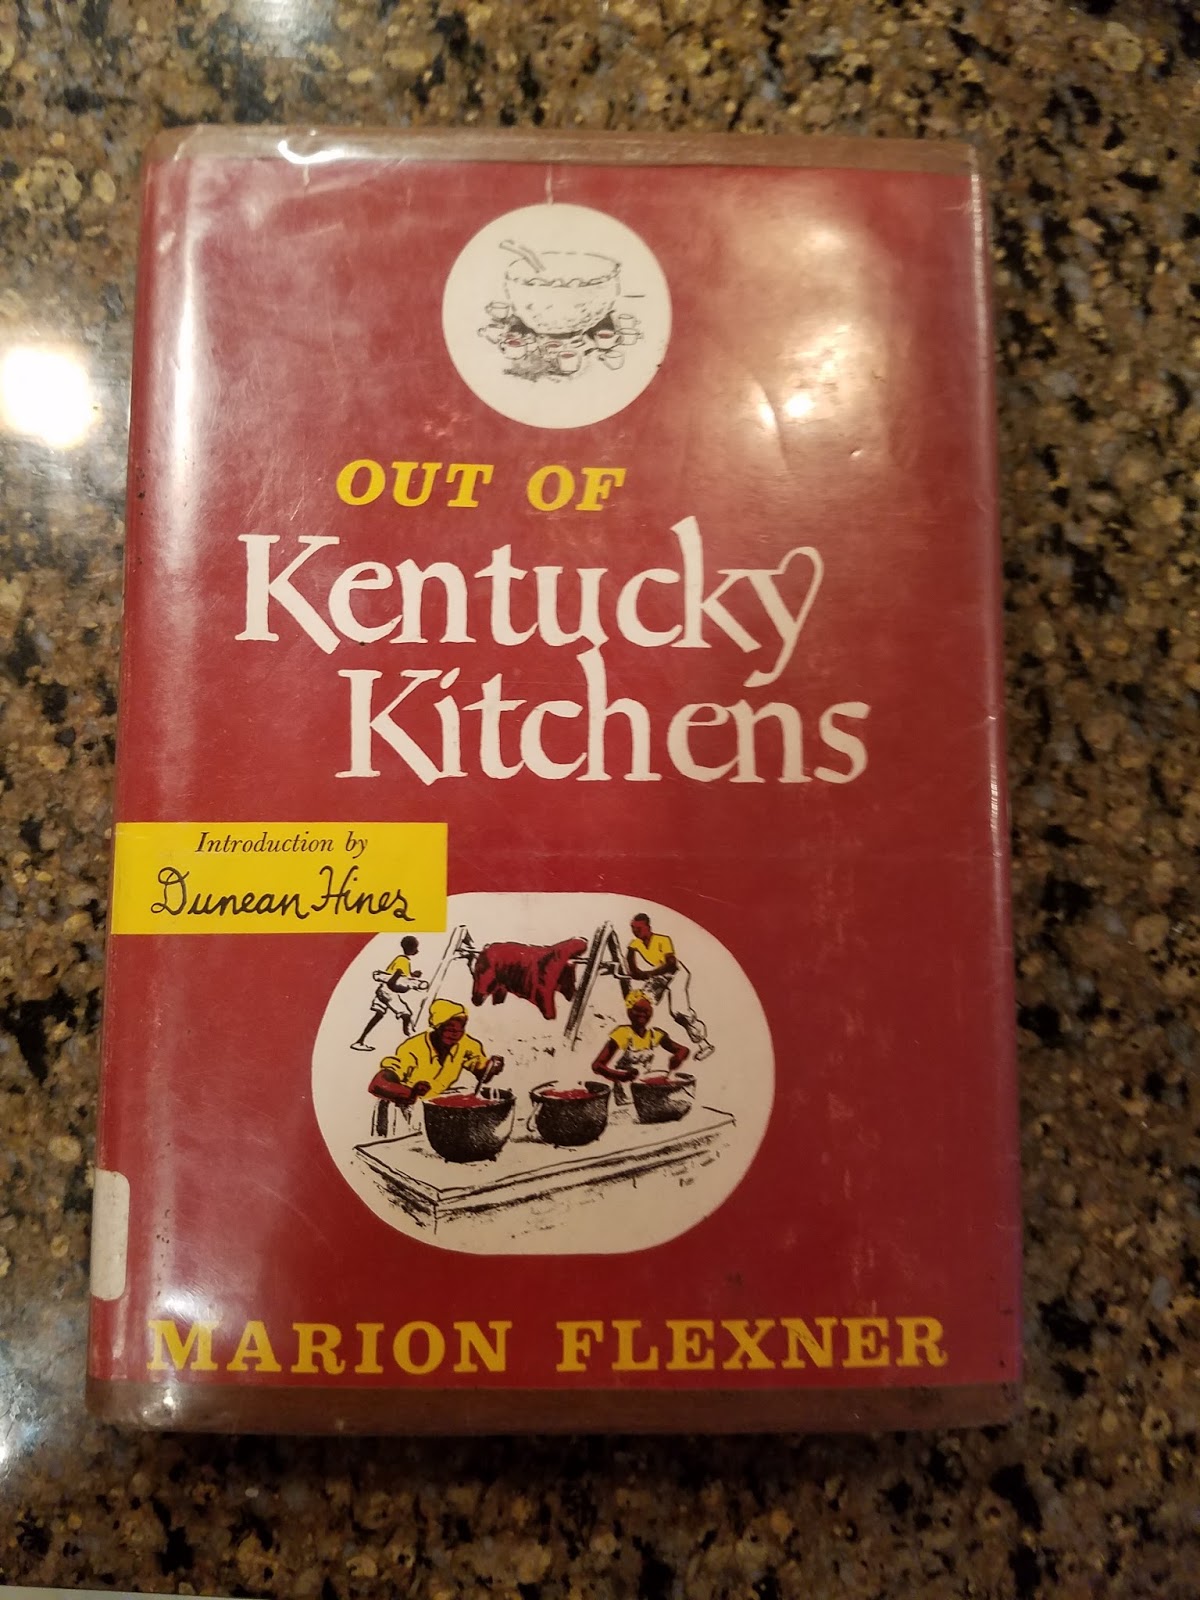
Now that the parents have moved further down south I have to find a new way to get my beer cheese fix. I've tried a few times to make my own version using spreadable processed cheese, but adding enough beer to make it noticeable resulted in a very loose cheese sauce rather than a spread. Recently I came into possession of a rather old (1949) cookbook of Kentucky recipes (a newer edition can be found here) and while leafing through found a recipe for beer cheese that I had to try.
I ended up making a few changes to the recipe while making it, and made some adjustments later. What I used was...
8 oz sharp cheddar
8 oz "rat" cheese
1 large clove garlic (grated)
1/2 cup beer (american pilsner)
1 1/2 TB worcestershire sauce
1/2 ts salt
1/2 ts powdered mustard
1/4 ts cayenne pepper
1/8 ts celery salt
I had never heard the term "rat cheese" before, I learned that at the time this book was published it was the common name for young, domestic cheddar, the kind you would use to bait rat traps. All the cheese was grated and placed in the bowl of a stand mixer to warm up a bit. The garlic was grated on a microplane and added along with all the dry spices. The beer was mixed with the worcestershire sauce and warmed up in a saucepan both to get rid of the carbonation and help the cheese become smooth. I turned the mixer to low and let it blend everything, then added the beer/worcestershire sauce mix and turned the speed up to medium and let it run for a while. The end result was good, all the flavors were these but it was chunky and a little to stiff for my liking. A few days later I decided to loosen things up a bit, I mixed another 1/4 - 1/3 cup beer with a 1/2 ts or so sodium citrate in a saucepan and started warming it up, then added the beer cheese and mixed vigorously over low heat until all the cheese melted and smooth. The result is much closer to the spreadable cheese I remember, but not quite. It seems to be a very thick liquid that self levels when left alone, next time I'll probably beat more air in to the mixture before packing into tubs. Still a good starting point and one that I'mm enjoying!
Wednesday, May 31, 2017
Thursday, April 27, 2017
It's Here!: ChefSteps Joule Edition
I started having problems with my WiFi Nomiku giving me erroneous low water alarms again. This is the second or third unit I've had the same problem with. I'm not sure why this keeps happening, maybe it's something with the water in my area or something I'm doing. This last time it started happening after I added some vinegar to the bath to take out some scale that was building up (we have pretty hard water), the manual suggests using citric acid for that. It's possible that the acetic acid in the vinegar is somehow damaging the water level sensor in the circulator, I'll try a few things to see if I can get everything working again before contacting customer service for another replacement.
Since I'm currently down a circulator I decided to finally try one I've been interested in for a while, but couldn't justify buying...the ChefSteps Joule. Shipping was amazingly fast, I placed the order for the circulator directly from ChefSteps.com on Sunday and it arrived at my door (all the way from China) on Wednesday.
The Joule is different from my other circulators in that it has no manual controls on the unit itself, with the exception of a single button on top. The circulator is controlled using an app installed on an Android or iOS. My understanding is that it can use either Bluetooth or WiFi depending on the situation. Pairing was pretty straightforward, after setting up the Joule in a bath and plugging it in I just opened up the app and saw a little button that said connect to Joule. After pushing the button my phone connected to the Joule via Bluetooth and then a screen popped up asking me to select my WiFi network and ask for my password. A few moments later and we were ready to go. I pushed the power button at the lower right hand corner of the screen, selected the temperature and the Joule came to life! At that time I had to leave, so I opened the app and turned off the circulator. Just as we were about to return home I fired up the app again to see how controlling the circulator from afar via WiFi worked, I touched the power button and selected a different temperature than I had entered earlier to start up the Joule. On the way home I received a push notification telling me that the bath had reached temperature and was ready to cook. When we did arrive at the house I pulled out my Thermapen to check the bath temperature and it was spot on at 140°f. I'll do some more playing around with the Joule tonight after work. One thing the Joule can apparently do, but that I can't test out, is be controlled by voice commands using an Amazon Echo. I may have to look at the Echo to see if there are enough other reasons to fork out the cash for one, for now I'll just have to stick to using the app.
Some initial thoughts...
Pros:
Very compact size for easy storage
Powerful heating element (1100 watts)
Water resistant (due to lack of manual controls)
WiFi and Bluetooth connectivity
Magnetic base to stick to the bottom of induction ready pots
Voice control option (with additional gadget)
Cons:
Lack of manual controls means you have to have an Apple or Android smart device to use.
That's pretty much all I can think of at the moment. I'll have to see if requiring a separate device to use the circulator is a hassle, I have two other "connected" circulators (WiFi Nomiku and Anova BT Precision Cooker) that can be controlled via apps but I almost never use that feature, preferring to set the temperature using the manual controls on the units. Having to use the app may take a little getting used to.
Tuesday, February 21, 2017
Mellow Mushroom Pizza Dough
While looking through a Reddit page for my home town I came across a thread about pizza where someone posted a link to a copycat recipe for Mellow Mushroom pizza dough. It's been a long time since I lived in Lexington and I can't remember if Mellow Mushroom was around at that time or if I ever ate there, but everyone seemed to rave about the crust on the thread so I decided to give it a try.
The recipe can be found here. I looked up ingredient weights on the internet to convert the recipe into bakers percentages and came up with this...
1 1/2 cups hot water 338 grams 74%
2 1/2 Tb molasses 54 grams 12%
1 TB Olive oil 14 grams 3%
2 packets IDY 16 grams 3.5%
3 1/2 cups bread flour 455 grams 100%
2 ts salt (table) 12 grams 2.6%
I based the weight of the flour on a site that gave weights of flour using various methods, the greatest weight given used the dip and sweep method. When I actually made the recipe the actual weight 3.5 cups flour measured with that method was 487 grams. The only other changes I made were to cut the yeast amount in half as I planned to cold ferment the dough, I used cold water instead of hot since I feared the 15 minute knead time would overheat the dough in the mixer and kill the yeast and I cut down the molasses to 45 grams since what I had was old and somewhat dehydrated. After making this recipe I looked online and found a significant range of weights given for the same measure of several of the ingredients, but this is my starting point.
First I mixed the water, molasses and olive oil and mixed them together before adding the yeast. I'd probably let the yeast hydrate in the water/molasses next time before adding the oil. I them measured out the flour and salt, added them to the work bowl of the stand mixer, attached the hook and started the machine. After everything was mixed together it was clear that the dough was too slack, I had to add a few spoonfuls of extra flour to the bowl in order to get a workable dough. I let the dough knead on low to medium speed for the 15 minutes indicated in the recipe, at the end I had a very smooth ball of dough with a finished temp of 77°f. The dough ball was rounded, put in an oiled bowl and placed int he refrigerator to cold ferment. The next day I rounded the dough again to allow carbon dioxide to escape and redistribute the yeast and put it back in the refrigerator for another day.
Two days later it was time to make pizza! I divided the dough in half, rounded both dough balls and put one out on the counter to rest for 2 hours so it could come up to room temperature. Trying to use dough from the refrigerator before it's had a chance to warm up will result in large bubbles forming during baking. The dough was very easy to work with, I was able to easily stretch it out without any tears and minimal shrink back after it was formed. I placed the skin of a piece of parchment on which I had sprinkled corn meal, sprayed the top with olive oil and sprinkled on some romano cheese. The recipe calls for parmesan crumbs, but I didn't have any. I then dressed simply with pizza sauce, mozzarella cheese and pepperoni with a final dusting of romano cheese on the top. The pizza was baked on a baking steel in an oven that had been preheated for about 30 minutes.
After removing from the oven the crust rim was sprayed with olive oil, the recipe calls for brushing it with garlic butter but I didn't have any on hand.
I was pretty happy with the recipe, but plan on making some changes for the next iteration. Even with the lowered amount of molasses the flavor was pronounced, that may just be because what I had in the pantry was old and concentrated. Next time I plan on using a new bottle and cutting down the amount to 5% of the flour weight. I also plan on cutting down the total hydration (water + molasses + oil) to about 70% and then figure out where to go from there.
EDIT 4/27/17
I've been playing around with the dough formula a bit, the current one I'm using is
Bread Flour 100.00% 500
Water 62.20% 311
Molasses 5.00% 25
Yeast (IDY) 1.60% 8
EVOO 2.80% 14
Salt 2.40% 12
This formula is for same day use (2 hour warm ferment), I find that letting the dough cold ferment in the refrigerator for a couple of days yields a final product that's easier to stretch, has better texture and flavor. When I go this route I cut the yeast down to 5-6 grams (1-1.2% flour weight). I try to keep total hydration (water + molasses + EVOO) to 70%.
Thursday, February 9, 2017
Sous vide, air fried sriracha wings.
This was something I made for the Super Bowl this year. Two days before the big game the chicken wings were cut into drumettes and wingettes with the wing tips saved for future stock making. They were dusted with the hot chicken spice mix from this post, vacuum sealed and cooked in a water bath fitted with my Nomiku and set to 64°C for about 5 hours, my Anova was nearby as a backup if needed. After removing the wings from the bath they were allowed to rest for about 15 minutes before being stashed in the fridge until the next day. I Removed the wings from the bag to a paper towel lined sheet pan and patted them dry as much as possible, they were them sprinkled with a 1/2 and 1/2 mixture of pink Himalayan sea salt and baking powder and put in the refrigerator overnight to dry. This is a technique I saw in a Serious Eats recipe for oven-fried Buffalo wings which I figured would work as well in the air frier as it does in a conventional oven. To finish the wings I set my Avalon Bay Air Fryer to 400°F and let it warm up for a few minutes. The wings were tossed in olive oil until well coated and placed in the fryer basket with as much space between them as I could muster, then the basket was inserted in to the air fryer. After 5 minutes I shook the wings and returned them to the fryer for another 4-5 minutes. At the end of that time the skin was nice and crispy and the wings completely warmed through. The sauce was equal parts sriracha sauce and sweet Thai chili sauce (I usually use Mae Ploy brand but couldn't find it at the supermarket that day so I used another brand) and a touch of soy glaze. They were served with blue cheese dressing for dipping.
I was pretty happy with these wings, cooking them sous vide resulted in an extremely moist and tasty wing. The air frying worked ok, but I think finishing them by deep frying in very hot oil would have produced a more crunchy skin. Since the wings are already cooked in the water bath you don't have to worry about cooking them through in the oil and can go for a short fry in hotter oil. I'll have to try that next time with and without the baking powder to see how it changes things.
Labels:
air fryer,
air frying,
chicken wings,
sous vide,
Sriracha
Friday, November 4, 2016
Impulse Buy: Versonel 6 Quart Programmable 6 in 1 Electric Pressure Cooker
Woot.com is a dangerous place, besides the all-cunsuming desire to score yet another Bag of Crap they often have great deals on things I want but probably really don't need. Such was the case last week when I succumbed to impulse and bought a Versonel 6 Quart Programmable 6 in 1 Electric Pressure Cooker from the site. I had heard a lot about Instant Pot electric pressure cookers and how useful they can be and this looked very similar at a much lower cost. Turns out there's a good reason for this, looking up the UL Certification number on their database revealed that both the Versonel electric pressure cooker and the Instant Pots are manufactured by Guangdong Media Consumer Electric Manufacturing Co LTD.
Anyway, the pressure cooker arrived on Wednesday!
![]() |
| Front view of the Versonel Pressure Cooker box. |
![]() |
| Side view of the box |
I haven't really had a chance to play with my new toy yet, but I wanted to at least make sure it worked so I thought a few red potatoes I had laying around would make good test subjects. After cleaning the bowl with soap and hot water to remove any manufacturing residue I put in the potatoes and some water. The lid was placed on the cooker by lining up an arrow found on the lid with the corresponding one on the body, then turned clockwise until an audible signal (a series of tones going up in pitch) indicated that the lid was in position. I chose the "Soup/Stew" preset for no good reason. After pushing the button the indicator flashed for about 10 seconds before the display changed to "On". It took about 15 minutes for the water to start to boil and the red button on the lid to pop up indicating the pot was pressurized, once the programmed pressure was reached the display changed to a countdown timer. When the time had elapsed a signal sounded and it was time to release the pressure. To do so you just turn lever on the lid left or right, the steam shoots straight up so it's a good idea to place a dish towel on the lid if you have the pot sitting on a counter under cabinets. You also may want to move the lever with a fork or something to keep your fingers away from the escaping steam.
The potatoes turned out pretty good, the skin peeled off without much difficulty and I was able to mash the flesh easily with a fork. I've downloaded a bunch of free pressure cooker cookbooks from the Amazon Kindle store including this one, so after work today I'll come up with something to do over the weekend.
Looking at various Instant Pot models, the Versonel looks most like an IP-LUX60. I'm not sure if it the same hardware with slightly different cosmetics or if they made something that just looks like the more expensive Instant Pot out of sub-par hardware. Time will tell. One thing missing from the Versonel is the steaming rack that comes with the Instant pot, but the rack from my Avalon Bay Air Fryer fits pretty well. There is no recipe book included (although like I mentioned there are lots of free or very cheap ones available from the Kindle store on Amazon.com) and the manual doesn't really give you that much information. Luckily the controls look pretty intuitive so it should be pretty easy to learn how to use.
Counter space is getting a little sparse due to all the gadgets I have living in the kitchen, luckily this addition also works as a slow cooker so I'll be able to relegate the old crock pot to the garage or a closet somewhere.
Labels:
electric pressure cooker,
instant pot,
IP-LUX60,
pressure cooker,
Versonel,
VSLP60
Monday, October 17, 2016
It's Here!: Misen Chef's Knife Edition
My latest Kickstarter acquisition is the Misen Chef's Knife. The stated goal of this Kickstarter campaign was to produce "An amazing knife at an honest price", they plan on selling the knife directly to consumers via the Misen web site for $65. So how good is it?
First off, the packaging is impressive. Each knife comes in a box custom designed to keep it safe and secure for shipping or transporting. In the photo to the left I've already removed the inner box from the outer sleeve. Upon opening the box the first thing you see is a card showing care instructions, on the other side are pictograms of different types of cuts demonstrated on carrots.
Below the card is a plastic insert that snugly holds the knife in place.
The Misen knife weighs in at 218.9 grams, about 33% lighter than my go-to Mac Professional 9 1/2" French Chef's Knife.
The balance point is just where it should be, right at the bolster where the handle meets the blade. If a chef's knife isn't balanced properly you end up expending extra energy moving the blade which causes muscle fatigue. The handle is made of molded thermoplastic and is very comfortable to hold.
My knives arrived on a Saturday in the afternoon, I wasn't expecting them until Monday so I didn't really have anything planned. I did have a new formulation of pizza dough in the refrigerator I saw on Chef Steps that I was going to use on Monday or Tuesday so I decided to pull it out early and make some pizza! The Misen had no trouble cutting extremely thin slices of onion and I was able to quickly chiffonade basil (picked from the AeroGarden) for the top. So far I'm very pleased with my new knife!
MMMM, pizza!
First off, the packaging is impressive. Each knife comes in a box custom designed to keep it safe and secure for shipping or transporting. In the photo to the left I've already removed the inner box from the outer sleeve. Upon opening the box the first thing you see is a card showing care instructions, on the other side are pictograms of different types of cuts demonstrated on carrots.
The Misen knife weighs in at 218.9 grams, about 33% lighter than my go-to Mac Professional 9 1/2" French Chef's Knife.
The balance point is just where it should be, right at the bolster where the handle meets the blade. If a chef's knife isn't balanced properly you end up expending extra energy moving the blade which causes muscle fatigue. The handle is made of molded thermoplastic and is very comfortable to hold.
My knives arrived on a Saturday in the afternoon, I wasn't expecting them until Monday so I didn't really have anything planned. I did have a new formulation of pizza dough in the refrigerator I saw on Chef Steps that I was going to use on Monday or Tuesday so I decided to pull it out early and make some pizza! The Misen had no trouble cutting extremely thin slices of onion and I was able to quickly chiffonade basil (picked from the AeroGarden) for the top. So far I'm very pleased with my new knife!
MMMM, pizza!
Labels:
basil,
chefs knife,
kickstarter,
knife,
Misen,
onions,
pizza
Friday, October 14, 2016
Brisket flat smoked in the Bradley Original Smoker
Since I bought my Bradley Original Smoker last year I've wanted to take a stab at brisket, but there was no way I could possibly justify buying a whole brisket when it is just two of us doing the eating. The solution came when a nearby grocery store put brisket flats on sale. The smallest one I could find was a 3.5 pound untrimmed flat, which was more than enough for me to play with.
It was a dark and stormy day when I originally planned on smoking the brisket, and since rain and electric smokers aren't the best of buddies I had to throw the meat in the freezer and wait for my chance. That day came the next weekend, when it was dry out but much cooler.
I started out early in the morning, around 5:30 am. First thing was to set up the smoker and get it warming up. I had recently bought a resin horizontal shed for my Weber grill and smoker to live in, it works great and keeps everything dry but the tradeoff was that in arranging things so everything looked nice and tidy I made the outlet I usually use for the smoker inaccessible. No big deal, there's another outlet a few meters away. Unfortunately that outlet was dead so I had to run an extension cord to the other end of the patio. Now that the smoker had power I put a foil tray of water in the bottom to catch the fat rendering off the brisket and went to the kitchen to prep the meat.
I made a rub consisting of roughly equal parts kosher salt and ground black pepper, about a tablespoon and a half. To this was added 1/2 teaspoon granulated garlic, cayenne pepper and celery salt. I didn't really need to trim any of the fat cap off, so I just cut a cross hatch to help the fat render away during cooking. The rub was sprinkled evenly over all surfaced of the brisket. I temperature probe was inserted in to the meat from the side until it was roughly in the center.
At 6:15 am we were ready to go. Once everything was in place the temperature probe wire was threaded up through the smoke vents and attached to the thermometer. The second wire seen that can be seen in the photo is the thermocouple attached to my PID controller. I had the controller set to 250°f, but the tray of water I put in to catch falling grease really made it difficult for the smoker to reach temp. The highest temperature the chamber could reach while the water tray was in place was about 220°f. The alarm on the meat thermometer was set to 165°f and I went about my day, every few hours I would go out to check on things, add more bisquettes (I was using the Jim Beam smoking bisquettes for the most part) and make sure everything was working properly. With the tray of water keeping the temperature down it took almost 10 hours for the brisket to reach the target temp of 165°f. Now it was time to wrap.
I wrapped the brisket flat in parchment paper (for some reason you can't find plain butcher paper anymore, then wrapped everything up in aluminum foil. Since there was no longer a danger of melting fat dripping down and starting a fire I removed the tray of water at this time as well and emptied the bowl of used bisquettes. With the extra water out of the picture the smoker quickly reached the controller set point of 250°f and things moved quickly from there. In less than 2 hours the brisket flat had made it to the final temperature of 195°f, was removed from the smoker and put in a beer cooler to rest. 195°f as the final temperature was pulled from a recipe online, I had seen anywhere from a low of 195°f up to a high of 204°f and decided to go low thinking that carryover would take the temperature up at least a few degrees. I was wrong, because this was such a small piece of beef compared to a while brisket there wasn't much if any carryover. To bring it up a few more degrees I ended up putting the wrapped brisket in a 200°f oven while I went down to the patio and got everything broken down and stowed away in the shed.
Here's the final product, nice bark on the top but a little too salty. Next time I'll have to go lighter on the rub. The meat was moist and delicious, not quite as fall-apart tender as I would have liked but very good. Next time I'll take it to a higher temperature, possibly 200° or even a few degrees higher.
This turned out good, but I think I can make it great next time with a few minor tweaks. I prepared the leftovers for freezing by vacuum sealing them and putting them in a 150°f water bath for a few hours with my WiFi Nomiku maintaining the temperature. The packs were then chilled overnight before being thrown in the freezer. It'll be much easier reheating brisket from the freezer this winter than freezing my butt off trying smoke another one during a Chicago winter!
It was a dark and stormy day when I originally planned on smoking the brisket, and since rain and electric smokers aren't the best of buddies I had to throw the meat in the freezer and wait for my chance. That day came the next weekend, when it was dry out but much cooler.
I started out early in the morning, around 5:30 am. First thing was to set up the smoker and get it warming up. I had recently bought a resin horizontal shed for my Weber grill and smoker to live in, it works great and keeps everything dry but the tradeoff was that in arranging things so everything looked nice and tidy I made the outlet I usually use for the smoker inaccessible. No big deal, there's another outlet a few meters away. Unfortunately that outlet was dead so I had to run an extension cord to the other end of the patio. Now that the smoker had power I put a foil tray of water in the bottom to catch the fat rendering off the brisket and went to the kitchen to prep the meat.
I made a rub consisting of roughly equal parts kosher salt and ground black pepper, about a tablespoon and a half. To this was added 1/2 teaspoon granulated garlic, cayenne pepper and celery salt. I didn't really need to trim any of the fat cap off, so I just cut a cross hatch to help the fat render away during cooking. The rub was sprinkled evenly over all surfaced of the brisket. I temperature probe was inserted in to the meat from the side until it was roughly in the center.
At 6:15 am we were ready to go. Once everything was in place the temperature probe wire was threaded up through the smoke vents and attached to the thermometer. The second wire seen that can be seen in the photo is the thermocouple attached to my PID controller. I had the controller set to 250°f, but the tray of water I put in to catch falling grease really made it difficult for the smoker to reach temp. The highest temperature the chamber could reach while the water tray was in place was about 220°f. The alarm on the meat thermometer was set to 165°f and I went about my day, every few hours I would go out to check on things, add more bisquettes (I was using the Jim Beam smoking bisquettes for the most part) and make sure everything was working properly. With the tray of water keeping the temperature down it took almost 10 hours for the brisket to reach the target temp of 165°f. Now it was time to wrap.
I wrapped the brisket flat in parchment paper (for some reason you can't find plain butcher paper anymore, then wrapped everything up in aluminum foil. Since there was no longer a danger of melting fat dripping down and starting a fire I removed the tray of water at this time as well and emptied the bowl of used bisquettes. With the extra water out of the picture the smoker quickly reached the controller set point of 250°f and things moved quickly from there. In less than 2 hours the brisket flat had made it to the final temperature of 195°f, was removed from the smoker and put in a beer cooler to rest. 195°f as the final temperature was pulled from a recipe online, I had seen anywhere from a low of 195°f up to a high of 204°f and decided to go low thinking that carryover would take the temperature up at least a few degrees. I was wrong, because this was such a small piece of beef compared to a while brisket there wasn't much if any carryover. To bring it up a few more degrees I ended up putting the wrapped brisket in a 200°f oven while I went down to the patio and got everything broken down and stowed away in the shed.
Here's the final product, nice bark on the top but a little too salty. Next time I'll have to go lighter on the rub. The meat was moist and delicious, not quite as fall-apart tender as I would have liked but very good. Next time I'll take it to a higher temperature, possibly 200° or even a few degrees higher.
This turned out good, but I think I can make it great next time with a few minor tweaks. I prepared the leftovers for freezing by vacuum sealing them and putting them in a 150°f water bath for a few hours with my WiFi Nomiku maintaining the temperature. The packs were then chilled overnight before being thrown in the freezer. It'll be much easier reheating brisket from the freezer this winter than freezing my butt off trying smoke another one during a Chicago winter!
Labels:
Bradley,
brisket,
brisket flat,
electric smoker,
new original smoker,
nomiku,
smoke,
smoking
Subscribe to:
Posts (Atom)


