For Labor Day I decided to make chicken breasts stuffed with mushrooms. They turned out really good, so even though I don't have any pictures I wanted to post the recipe.
First, for the mushroom stuffing I diced up a little over a pound of mushrooms in to a 1/4" dice. They were mostly button mushrooms but I had a few wild mushrooms left over from a pizza last week so I threw those in as well. These were sauteed in a few tablespoons of olive oil with a little salt and pepper. While the mushrooms were working away I diced up a vidalia onion in to the same size dice and added it once the mushrooms were nice and caramelized. These were allowed to cook until the onions were soft, translucent and starting to brown, then a finely diced clove or garlic and some fresh rosemary were added. When the smell of garlic started to waft off the pan about 1/2 cup of a dry white wane was added. This was cooked until the liquid was au sec, removed from heat, adjusted for seasoning and allowed to cool to room temperature.
To prep the chicken breasts I inserted a paring knife in the side of the thickest part, then moved it back and forth to produce a pocket in the flesh. Then I used my fingers to widen the pocket so it could take more stuffing. The mushroom stuffing was spooned in to the opening and pushed throughout the pocket, then the opening was sealed using a small wooden skewer and the chicken allowed to rest in the fridge.
The morning of Labor Day the chicken was coated with olive oil and seasoned with a mixture of salt, pepper, sugar, paprika, ancho chili powder and granulated garlic. The breasts were then sealed in a vacuum bag (FoodSaver) and cooked sous vide at 150 degrees for about 3 hours. Once removed, the bag was placed in the refrigerator to chill until we were ready for final cooking.
When we were ready to cook I lit a chimney of charcoal (what's Labor day without grilling?) and set up the grill for indirect cooking. A drip was placed in the center and the coals placed on either side. The chicken breasts were placed on the cooking grate directly over the drip pan and a large handful of soaked apple wood chips were placed on each pile of coals. One of the breasts had a temperature probe inserted in the middle of the stuffing so I could keep an eye on things, then the top was put on and the vents closed about 3/4 of the way to keep the temperature low. The chicken was allowed to smoke until the internal temperature reached 150 degrees.
The end result was really nice. Beautiful mahogany color with great smoke flavor, but not so overpowering that you couldn't taste the other ingredients and the cooking method kept the meat nice and moist. This is rather labor intensive, but a recipe I'll keep in mind for special occasions.
Wednesday, September 8, 2010
Friday, August 20, 2010
Dinner at SoNo Wood Fired...This time it's open!
After last weekend's misfire with lunch at SoNo, I decided to try again for dinner. I found their hours posted on Yelp, not sure why they can't do something with their website but that is another issue. Betty and I had decided on the day to go, and naturally I got stuck at work that day and was running late. When I finally made it home, we started the walk to the intersection of North and Clybourn aves.
We were greeted at the door by the hostess, who promptly sat us at a table near the front. The space is nicely designed, with lots of glass and wood. There are glass doors at the front that can be opened when the weather cooperates, and last night was beautiful. After several minutes our waitress came by to take our drink and appetizer orders. SoNo has a fairly extensive wine list and had 21 bottled beers available. It would be nice to have the beers on tap that their burger bar next door offers available, but the beers offered were well chosen micros. We ordered the pomodoro and London Fog bruschettas as appetizers, which arrived soon after our drinks. The pomodoro was good, lots of fresh, ripe tomatoes, shaved parmesan cheese and good olive oil on top of the toasted bread. The better of the two was the London Fog, it had a nice portion of the bleu cheese, caramelized cipollini onions and lavender honey. Both were good, but the portion size is a little small for the $3 price per bruschetta.
For pizzas, I chose the Soppressata Diavola (spicy soppressata, bufala, tomatoes, charred onions & basil) and Betty ordered a Funghi (wild mushrooms, fontina, crispy sage & toasted garlic). The pizzas arrived in about 15 minutes.
 The Soppressata lived up to the spicy description, other than that I found this to be a little bland. Like my experience at Urban Burger Bar, the chef seems to under season his food in my opinion. The tomatoes were nice but there were too many of them on the pie which resulted in a pool of liquid on the plate. The bufala mozzarella was pretty good as were the charred onions. The crust had a very nice char on it, but didn't have much taste other than that. When I make this style of pizza at home I use a retarded dough formulation which allows for a long, slow, cold fermentation that produces a nice flavor in the finished product. This crust didn't have that flavor. Perhaps we were there on a night when their dough hadn't had a chance to age enough, I'll withhold judgement until I've eaten there at least once more.
 I liked the funghi pizza better than the Soppressata one. This is a white pizza, so none of the tomato juice pooling on the bottom of the plate. The pie had a nice taste of roasted garlic to it and the mushrooms had some good caramelization to them. The flavor combination of mushrooms, fontina, roasted garlic and sage really worked well. Like the first pie I didn't think the crust had much flavor, it seemed to be acting as more of a platform than a component of the dish contributing flavor. As you can tell, I rally find crust to be an important part of a pizza. The cheese seemed almost creamy, which was very nice. Even with the crust issues, this is a pie I'd order again.
We didn't order any dessert, but the menu had about six flavors of gelato, chocolate cake, pana cotta and the like. All in all, I liked this place. I'm sure we'll go back at some point since there really isn't anything else like it within walking distance for us. Hopefully they will be able to improve their crust and get a little more aggressive in the seasoning as they mature.
We were greeted at the door by the hostess, who promptly sat us at a table near the front. The space is nicely designed, with lots of glass and wood. There are glass doors at the front that can be opened when the weather cooperates, and last night was beautiful. After several minutes our waitress came by to take our drink and appetizer orders. SoNo has a fairly extensive wine list and had 21 bottled beers available. It would be nice to have the beers on tap that their burger bar next door offers available, but the beers offered were well chosen micros. We ordered the pomodoro and London Fog bruschettas as appetizers, which arrived soon after our drinks. The pomodoro was good, lots of fresh, ripe tomatoes, shaved parmesan cheese and good olive oil on top of the toasted bread. The better of the two was the London Fog, it had a nice portion of the bleu cheese, caramelized cipollini onions and lavender honey. Both were good, but the portion size is a little small for the $3 price per bruschetta.
For pizzas, I chose the Soppressata Diavola (spicy soppressata, bufala, tomatoes, charred onions & basil) and Betty ordered a Funghi (wild mushrooms, fontina, crispy sage & toasted garlic). The pizzas arrived in about 15 minutes.


We didn't order any dessert, but the menu had about six flavors of gelato, chocolate cake, pana cotta and the like. All in all, I liked this place. I'm sure we'll go back at some point since there really isn't anything else like it within walking distance for us. Hopefully they will be able to improve their crust and get a little more aggressive in the seasoning as they mature.
Key Lime Pie
Years ago I was given a recipe for key lime pie by a person in Miami and promptly lost it. A good ten years later while going through a drawer of papers, there it was! I made a pie last weekend and it turned out pretty good so I thought I'd post the recipe and never lose it again!
This is a very simple recipe. I used a store-bought graham cracker crust and bottled key lime juice. About a month or two ago I did see fresh key limes for sale at Dominick's, but I hadn't found the recipe at that point and didn't grab them. Next year for sure! You will want to have a pie crust ready before you mix the filling. Graham cracker crusts are traditional and easy to make, but I was being lazy.
The filling has just four ingredients...
4 egg yolks
1 can sweetened condensed milk
1/4 cup key lime juice
pinch of salt
Whisk the yolks together, then whisk in the condensed milk and salt. When everything is smooth and uniform whisk in the key lime juice until well combined and pour immediately in to the waiting crust. The acidity of the key lime juice will start to set the curd pretty quickly, the filling does not have to be cooked at all but will "cook" in the mixing bowl if you don't get it in to the crust within a few minutes. I just make a quick whipped cream to go with the pie but the original recipe called for a meringue topping make with the four egg whites you should have left over and three tablespoons of sugar, whipped to stiff peaks. Once this is placed on the filling the pie is baked in a 350 degree oven for about 10 minutes to brown the meringue. Using the store bought crust and whipped cream instead of meringue, this dessert took about 5 minutes to make and was liked by all who partook! Next time I make it I might add a little fresh lime and lemon juice to freshen up the bottled key lime juice, I'll likely try that this weekend.
Monday, August 16, 2010
Lunch at SoNo Wood Fired, uh....make that Urban Burger Bar.
Last week there was an blog in the Chicago Tribune talking about a new wood fired pizza place called SoNo Wood Fired. At the time I'm writing this the web site basically says very little, no menu, no contact info, just a logo and a place to sign up for twitter and facebook feeds. This was the weekend of the Chicago Air and Water Show and the Midwest Buddhist Temple's Ginza Festival. Every year during these events (which normally happen on two consecutive weekends instead of on the same weekend) the only thing to do is find a parking spot on Friday and leave your car there for the entire weekend. Move your car and you're not likely to find another space within a mile of home until Monday. Until I saw the blog about this new restaurant my plan was to visit Old Town Social for lunch on Saturday, I've enjoyed most of what I've tried there. With this new information in hand, I ventured out on a very how Saturday just before noon and trekked my way to SoNo Wood Fired...and found it closed. No hours posted on the door, just a menu and a locked door. I guess opening a restaurant with no information on the web page and no information on the door is one way to go...
Anyway, next door to SoNo is Urban Burger Bar. The two restaurants are owned by the same people so I figured they might know if the pizza place would be opening for lunch. The answer was no, it wouldn't open until 4:30pm. Oh well, I decided to have my lunch at the also new Urban Burger Bar.
UBB is a pretty nice bar, they have a wide selection of beers with about 15 or so on tap. And the stuff on tap is GOOD beer, mostly from micro breweries. Plus, on the Saturday I was there ALL draft beers were only $3! The main food attraction is (coincidentally) burgers. There is a long list of topping to choose from, with a few premium ones that cost extra. For some unknown reason the menu on their website starts with their "Urban Stackers" and leaves out the "burger bar" entirely. Someone really needs to talk to their webmaster to get things straightened out! After I enjoyed my Crooked Tree IPA from Dark Horse Brewery I ordered my burger. I chose a grass fed burger (all burgers are 1/2 pound) made with beef from the Tallgrass Beef Company, an organic beef producer partially owned by local media personality Bill Kurtis. For toppings I chose mushrooms, crispy onions, white cheddar cheese and bacon. The burgers come with a side, I chose regular fries but there are other options like sweet potato fries. They also offer a selection of dipping sauces for the fries instead of just ketchup, I chose the chipotle aioli.
 The burger arrived in about 10-15 minutes. Not bad considering that the place was pretty busy. The burger itself was cooked to a nice medium rare as requested. It was juicy and tasty, but could have used a little more seasoning in my opinion. I have to admit that I'm kind of a bun man, and this one was nice. A bad bun can ruin the burger experience for me. This one was fresh, sturdy and gave just the right amount when you squeezed it to take a bite. They were pretty generous with the toppings. The crispy onions where sliced thin, breaded and cooked until crispy. I would have no problem having just these as a side. The mushrooms could have been sauteed a little more, I like some caramelization on my sauteed shrooms and these seemed a little on the bland side. The cheese and bacon seemed top quality. All in all, there wasn't much to complain about with this burger that couldn't be addressed with a salt shaker at the able. The fries were good as well, and since I'm not a big fan of ketchup I appreciated all the dipping sauce options available. The chipotle aioli was really good on its own, and I used a bit of it on the burger as well. I'm looking forward to trying my original plan, pizza at SoNo, at some later date (and time).
Anyway, next door to SoNo is Urban Burger Bar. The two restaurants are owned by the same people so I figured they might know if the pizza place would be opening for lunch. The answer was no, it wouldn't open until 4:30pm. Oh well, I decided to have my lunch at the also new Urban Burger Bar.
UBB is a pretty nice bar, they have a wide selection of beers with about 15 or so on tap. And the stuff on tap is GOOD beer, mostly from micro breweries. Plus, on the Saturday I was there ALL draft beers were only $3! The main food attraction is (coincidentally) burgers. There is a long list of topping to choose from, with a few premium ones that cost extra. For some unknown reason the menu on their website starts with their "Urban Stackers" and leaves out the "burger bar" entirely. Someone really needs to talk to their webmaster to get things straightened out! After I enjoyed my Crooked Tree IPA from Dark Horse Brewery I ordered my burger. I chose a grass fed burger (all burgers are 1/2 pound) made with beef from the Tallgrass Beef Company, an organic beef producer partially owned by local media personality Bill Kurtis. For toppings I chose mushrooms, crispy onions, white cheddar cheese and bacon. The burgers come with a side, I chose regular fries but there are other options like sweet potato fries. They also offer a selection of dipping sauces for the fries instead of just ketchup, I chose the chipotle aioli.

Saturday, July 31, 2010
Birthday dinner at Tru
On Thursday, Betty treated me to a dinner at Tru for my birthday. In 2004 we had dinner at Charlie Trotter's kitchen table in celebration of my graduation from cooking school and we have been to Spiaggia for a private party, but normally we don't get much more expensive than Boka or Topolobampo. So for Tru, I got all decked out in my one and only suit and we headed out. When we arrived we had to wait for the valet to verify our reservation before he would take our car. Once that was done, we entered the restaurant.
The entrance was very dark, we were met at the door and once they checked our reservation we were led to our table. The dining room was also dimly lit, but with spotlights shining down on the individual place settings set up on tables with white linens. I didn't really think of it at the time but I believe only the three positions on the table where we were sitting were lit, the fourth wasn't. I noticed throughout the evening that everything seemed to be pre-staged for each table. For instance, when they needed flatware for our table they would open a drawer at the service stand and pull out a platter with the three sets of silverware our table required.
Once we were seated, a waiter arrived at our table with menus printed just for us (They each had "Happy Birthday Chris" on them). He offered sparkling or still water and inquired if any of us would like to start off with a glass of wine or cocktail. Since we were planning on ordering a tasting menu, I opted for the wine pairings while Betty chose a single glass of wine. I wish I could remember the names of the wine pairings, but I wasn't taking notes.
The food started off with a gougère, a choux pastry made with cheese. We were then offered a choice of breads, brioche roll, chapeau roll, pumpernickel roll and parmesan crisp. My favorite was the chapeau roll, which seemed to be made of a standard french bread dough. Salted and unsalted butters were provided, but a carafe of a really good olive oil would have been nice. The anuse bouche was a savory panna cotta with a paper thin tuile and dusted with caramelized fennel powder. I wasn't sure about taking pictures, so I didn't pull out my iPhone until the first course was served.
 The first course was listed as "white sturgeon "caviar", avocado, hazelnut". The "caviar" was served in a caviar tin atop a bed of avacodo puree with crackers and a mother of pearl spoon. I believe the hazelnuts were between the "caviar" and the avocado puree. Obviously, this isn't actually caviar. Instead it is the essence of sturgeon mixed with other ingredients and made in to a caviar like shape through a process called spherification. Follow the link for details on the spherification process, the term was coined by Ferran Adria of El Bulli fame and is quite interesting. I'm not really a big fan of real caviar, so I wasn't disappointed at all with this "caviar". Everything worked well together and the presentation was playful. I'd give this first course an A.
 The second course was a corn soup garnished with creme fraiche and bacon bits accompanied with cheese pastry straws. Unfortunately I have not receive the copy of the menu they were going to email to me, so I can't give you the menu description. If it finds its way to me I'll edit the post with their description. The waiter suggested drinking the soup directly from the cup, using the gold wing as a handle. The soup had a great corn flavor and was VERY HOT! The only way to drink it was to wait a few minutes between sips for the top layer to cool off a bit. I wasn't really fond of the cheese pastry straws, to me they tasted like old oil. Betty apparently wasn't too fond of them wither since she quietly moved her second one to my plate. The soup alone would probably rate an A, but due to the cheese straws I'd have to give this course a B.
 The third course was listed on the menu as "wagyu beef ravioli, foie gras, chive". The wagyu beef in the ravioli consisted of meat that had been braised and shredded, they could have been from the shank or short rib. Since they have braised short ribs on their prix fixe menu I'm guessing that is what it was. I overheard a waiter telling another table that the short ribs were braised for 72 hours, I'd REALLY like to try that some day! The foie gras medallion was grilled, I'm not a big fan of foie gras but this was really good. The remaining garnish was chives and edible flower petals. After the bowl was brought to the table, extremely hot beef consommé was poured over. Once again, this dish was excellent. Very intense beefy flavor in the consomm, tender wagyu beef in the ravioli and foie gras that had a nice caramelized crust yet was still creamy inside.This dish was easily another A. Heck, let's give it an A+
 The fourth course was listed on the menu as "alaskan halibut, young carrot with ginger". The halibut was poached, possibly in butter, and was cooked perfectly. It was just to the point of flaking, moist and seasoned just right. It was served with three preparations of carrots, the baby carrot with micro parsley, a reduction of carrot and ginger and a carrot foam. Once again, I didn't see many problems with this course. Everything was cooked perfectly. Betty wasn't sure about the foam and Jenny ended passing most of her halibut to me. Oh well, I was making out like a bandit that night. Even if others might not have enjoyed this course as much as I did, I'll still give this course another A.
 The fifth course was described as "glazed veal ribeye, spring garlic, asparagus, wild mushroom. The portion size was a little small on this one, there were three thin slices of veal, a caramelized spring garlic, two asparagus spears and three types of wild mushrooms. The flavors were excellent and because the halibut portion in the fourth course was fairly large I won't hold the portion size against this course. I just with there had been more of it! I believe the sauce on the plate was a veal demi-glace. Everything was again cooked to perfection and seasoned just right. There is a reason placed like Tru don't have salt and pepper shakers on the table! I'll give this course another A.
Between the fifth and sixth coursed, the "treat" cart was rolled over and we got to choose a few small sweets. The offerings included truffles, house-made marshmallows, macaroons, fruit jellies and small chocolate tortes. Each of us chose several and everything was excellent. I had the chocolate torte (which was actually some type of white cake that had been soaked in chocolate liqueur)and a macaroon. Between the three of us we got to sample all the items on the cart.
 Between the fifth and sixth coursed there was a little bit of a service bump. One of the waitstaff apparently thought we had ordered the prix fixe menu and presented us with the cheese cart and dessert menus. We sat there for about 10 minutes before our main waiter came over and politely asked if we wanted to change out dessert course or order any coffee or tea. Betty ordered a coffee, Jenny ordered a tea and I stuck with the remaining wine pairing I was expecting with the dessert course. As you can see, I jumped the gun a little bit and took a bite before remembering to pull out my phone and take a picture. The menu lists this course as "raspberry sorbet, yuzu cremeux, crispy coconut". The sorbet by itself was overly sweet and the yuzu cremeux didn't seem sweet at all, but when you ate them together, as intended, they were superb. The crispy coconut were setting atop macerated raspberry halves with what I believe was raspberry coulis used to stick them in place. This dish was another home run, definately and A.
The final thing, which I didn't get a picture of, was a small chocolate torte with ganache frosting and two lit birthday candles sticking out the top. This was about the diameter of a quarter so there was no sharing this time! It was presented on a rectangular plate with "Happy Birthday Chris" written in white chocolate.
After the bill had been paid we walked toward the exit and admired some of the art on the walls. The staff presented us with small breakfast cakes to enjoy with coffee the next morning and held the door for us as we walked out. Our car was waiting for us at the curb as we exited, which was a nice touch. All in all, this was a superior dinner and one I'll remember for a long time (minus what I lost from drinking all those wine pairings!). As far as the wine pairings go, I though three of them really accentuated the coursed they were presented with, while the other three were good on their own but didn't seem to really boost the foods they were served with. This could just be my own biases when it comes to wine, I'm not a big fan of fortified or overly sweet wines which several of these were. Now I have to figure out where to take Betty for her birthday, I suggested Alinea but she shook her head no. Probably doesn't want me to spend that much money, but I may just make reservations anyway. I'll tell her that were going to Boka and just walk on by a few doors to Alinea. If Grant Achatz's next restaurant, Next, has opened yet I may take her there instead, but I would like to go to Alinea while it is still considered the best restaurant in the United States.
The entrance was very dark, we were met at the door and once they checked our reservation we were led to our table. The dining room was also dimly lit, but with spotlights shining down on the individual place settings set up on tables with white linens. I didn't really think of it at the time but I believe only the three positions on the table where we were sitting were lit, the fourth wasn't. I noticed throughout the evening that everything seemed to be pre-staged for each table. For instance, when they needed flatware for our table they would open a drawer at the service stand and pull out a platter with the three sets of silverware our table required.
Once we were seated, a waiter arrived at our table with menus printed just for us (They each had "Happy Birthday Chris" on them). He offered sparkling or still water and inquired if any of us would like to start off with a glass of wine or cocktail. Since we were planning on ordering a tasting menu, I opted for the wine pairings while Betty chose a single glass of wine. I wish I could remember the names of the wine pairings, but I wasn't taking notes.
The food started off with a gougère, a choux pastry made with cheese. We were then offered a choice of breads, brioche roll, chapeau roll, pumpernickel roll and parmesan crisp. My favorite was the chapeau roll, which seemed to be made of a standard french bread dough. Salted and unsalted butters were provided, but a carafe of a really good olive oil would have been nice. The anuse bouche was a savory panna cotta with a paper thin tuile and dusted with caramelized fennel powder. I wasn't sure about taking pictures, so I didn't pull out my iPhone until the first course was served.


Between the fifth and sixth coursed, the "treat" cart was rolled over and we got to choose a few small sweets. The offerings included truffles, house-made marshmallows, macaroons, fruit jellies and small chocolate tortes. Each of us chose several and everything was excellent. I had the chocolate torte (which was actually some type of white cake that had been soaked in chocolate liqueur)and a macaroon. Between the three of us we got to sample all the items on the cart.

The final thing, which I didn't get a picture of, was a small chocolate torte with ganache frosting and two lit birthday candles sticking out the top. This was about the diameter of a quarter so there was no sharing this time! It was presented on a rectangular plate with "Happy Birthday Chris" written in white chocolate.
After the bill had been paid we walked toward the exit and admired some of the art on the walls. The staff presented us with small breakfast cakes to enjoy with coffee the next morning and held the door for us as we walked out. Our car was waiting for us at the curb as we exited, which was a nice touch. All in all, this was a superior dinner and one I'll remember for a long time (minus what I lost from drinking all those wine pairings!). As far as the wine pairings go, I though three of them really accentuated the coursed they were presented with, while the other three were good on their own but didn't seem to really boost the foods they were served with. This could just be my own biases when it comes to wine, I'm not a big fan of fortified or overly sweet wines which several of these were. Now I have to figure out where to take Betty for her birthday, I suggested Alinea but she shook her head no. Probably doesn't want me to spend that much money, but I may just make reservations anyway. I'll tell her that were going to Boka and just walk on by a few doors to Alinea. If Grant Achatz's next restaurant, Next, has opened yet I may take her there instead, but I would like to go to Alinea while it is still considered the best restaurant in the United States.
A (little over) week of going out for lunch continued.
I didn't go out to lunch on Thursday, we had reservations for Tru that evening and I wanted to be hungry for that! On Friday, I decided to finally try Hot Doug's. I'd heard a lot of things about "The Encased Meat Emporium" and wanted to try it out for myself. Friday was chosen since they only offer their duck-fat fried french fries on Friday and Saturday. I made it to the restaurant just before it opened at 10:30 am, and the line already stretched half way down the block. By the time I made it to the counter it was 11:20 am. No biggie, I'd heard that there was always a wait at Doug's. I ordered a "The Dog" (Chicago Style), "The Paul Kelly" (bratwurst), and "The Salma Hayek" (andouille) along with an order of duck fat fries. And NO, I didn't finish it all!. With the exception of "The Dog", I asked Doug to choose the toppings he thought were best (he seems like a genuinely nice person). My order was to go, and it shouldn't have taken more than 10 minutes to get home, but someone was screwing with the traffic lights on Elston at Fullerton which was causing a HUGE backup. 45 minutes later I finally made it home.

 For lunch I ordered one of their specials, a house-made kielbasa sausage on a pretzel roll topped with caramelized onions and dusseldorf mustard with a side of fries and their truffle aioli to dip them in. The sausage was a very good rendition of a kielbasa, slightly smokey and very juicy. The roll was outstanding, it has a very thin but crisp crust and a soft crumb. All in all, a very good sandwich. The fries were not particularly good this time. I'm not sure if they were under cooked or if they had just been sitting under a warming lamp for some time before coming out to me. Oh well, the beer makes up for an occasional misfire on the food and keeps me coming back! The Midway IPA was fantastic, I ended up having two of them while I finished my lunch. The new brewmaster Jarod is kepping the quality as high as his predecessor Wil did. As long as they keep producing excellent beers I'll keep buying them! I've never been to the Wrigleyville Goose Island location, but I understand that they are smack-dab in the middle of the recently approved hotel-retail development for that block. I hope they manage to stay where they are!

On the far left is the Salma Hayek topped with caramelized onions, mustard, sport peppers and a dill pickle. The falvors were all good, but the texture of the sausage seemed a little dry and chewy to me. I don't often eat andouille as a whole sausage so this might be how it's supposed to be. In the middle is "The Paul Kelly" topped with mustard, relish and sauerkraut. The sausage was cooked perfectly, very juicy and perfectly spiced. The toppings were an excellent compliment to the sausage. On the right is "The Dog", essentially a traditional Chicago style hot dog with mustard, onion, green relish, sliced tomato, sport peppers, pickle spear and celery salt. I got mine char grilled and it was probably the best Chicago style dog I've ever had. The dog was juicy and had just the right snap, even after the extra long transit time. These were not your standard store bought tomatoes, they were ripe and tasted like a tomato should and the bun, like those on the other two sausages, was soft yet stood up the the juices let off by the encased meats. The fries made in duck fat were good, but I can't say if they are that much better than their regular fries though. Was it worth the wait. Yep, I'd go again and probably will. I'd hate to see how long the lines get on a Saturday though.
On Saturday, I made my usual trek to Goose Island for lunch and a few beers. Every Thursday they have their Beer Premier, which I occasionally make it to but usually wait until the weekend to try their new offerings. This week the premier is their Midway IPA and this weeks "Farmer's Market" series beer is the Midway IPA infused with fresh apricots from the Green City Market.
 For lunch I ordered one of their specials, a house-made kielbasa sausage on a pretzel roll topped with caramelized onions and dusseldorf mustard with a side of fries and their truffle aioli to dip them in. The sausage was a very good rendition of a kielbasa, slightly smokey and very juicy. The roll was outstanding, it has a very thin but crisp crust and a soft crumb. All in all, a very good sandwich. The fries were not particularly good this time. I'm not sure if they were under cooked or if they had just been sitting under a warming lamp for some time before coming out to me. Oh well, the beer makes up for an occasional misfire on the food and keeps me coming back! The Midway IPA was fantastic, I ended up having two of them while I finished my lunch. The new brewmaster Jarod is kepping the quality as high as his predecessor Wil did. As long as they keep producing excellent beers I'll keep buying them! I've never been to the Wrigleyville Goose Island location, but I understand that they are smack-dab in the middle of the recently approved hotel-retail development for that block. I hope they manage to stay where they are!
Wednesday, July 28, 2010
A (little over a) week of going out for lunch.
At work we were asked to plan out all our vacation time for the entire year by March. We were in desperate need of an additional employee and this was a way to show how this person would be used and justify the hiring. I chose to take the week of July 26th off mainly because my birthday is this week and there are a lot of places I'd been meaning to visit for lunch but never had the time. Each day this week I've been trying to visit a place I've never been to or haven't been to for a long time.
The first place I went to actually was before my vacation. Old Town Social is a bar that opened up ten months ago less than two blocks from where I live. It's on a section of North Avenue that I rarely walk by, and when driving by I figured it was just some kind of hook-up bar so I never took the time to go in. I began hearing things on the local boards about the house made sausages and cured meats, so last week I decided to walk over and try it out. The interior is nice, high ceilings, huge windows, wooden tables, high chairs and a huge bar. I took a seat at the bar and started looking over the fairly extensive list of draft and bottled beers. The first beer I tried was a New Belgium Ranger IPA. Very nice! I ordered some food to go, the special of the day was a duck andouille hoagie with a spicy aioli so I ordered one of those and an order of vidalia onion rings. I then had a Lagunitas IPA while I was waiting. Again a very nice hoppy beer! The food arrived and I quickly walked home.
 The duck andouille hoagie was excellent. The sausage had a great smokey flavor with all the spiciness you expect from an andouille sausage. The roll was buttered and nicely toasted, which made for a great contrast with the other softer ingredients. At a price of $9 it was worth every penny.
 One thing about Old Town Social is that everything is a la carte. The prices look cheap until you realize that a side of fries or onion rings will set you back another $5. The onion rings were good, but seemed a bit oily by the time I got to them. I blame this on the way they were packed, the box was sealed tightly in plastic wrap so the rings were basically steaming all the way home. The dipping sauce is the same aioli that was on the hoagie.
Betty and I went back a few days later for dinner. I ordered the hamburger "their way", which includes cheddar, pickle, lettuce, tomato, house made bacon, aioli and a fried egg on a sesame seed roll. Betty had the B.L.T. and we ordered a boudin sausage and an order of fries on the side. The burger was good, flavors were all there, but it was cooked well over the medium I had ordered. I also wasn't a big fan of the bun, which I think was house made. It didn't have enough "give" so when I took a bite things started getting squeezed out the back. If they had a softer bun and could have cooked it to the right temperature it would have been superb. Betty liked the B.L.T. The fries were very good, crispy with a soft interior, but a little on the greasy side. I don't know about the boudin, Betty thought there was too much liver flavor in it and I wasn't a fan of the texture. The only reason we ordered it was because they were out the the duck andouille. There is still a lot on the menu I'd like to try, so I'll be back. In a few weeks when we have the Air and Water show and the Ginza Festival happening on the same weekend I'll be stuck in the neighborhood, so I'll go again.
OK, now on to the actual vacation... On Saturday I went to Goose Island, as I often do. Love their beers and the food at the Clyborne location is somewhat more upscale than their other location on Clark in Wrigleyville. I wasn't very hungry so I tried the rabbit rolls, which were very tasty. I pretty much go to Goose every Saturday to try out their new beer of the week and have lunch.
On Monday Betty and I went to 90 Miles Cuban Cafe. We had seen the location on Clybourn last year when we went to a play at the Viaduct Theater, but it was closed by the time the play let out. For this outing we went to the location at 2540 W. Armitage. I ordered the cubano sandwich and Betty ordered an special that the waiter recommended. It was chunks of pork which had been marinated in white wine and citrus, then deep fried and topped with a garlic sauce. It was very good and came with sweet plantains and a mix of black beans and rice. My cubano sandwich was forgettable. The bread was what you would expect for a cubano, but the interior was soggy as if it had been made earlier and reheated. The ham and the roast pork were used sparingly, and the sandwich was pretty bland. The version at Goose Island is much better. I wouldn't order one of their cubano sandwiches again, but I would try their dinners.
Tuesday I went to Piece. It's a brewery and pizzaria that specializes in New Haven style pizza. They have a lunch special which is an individual pizza with three toppings for $7.95. I chose pepperoni, suasage and black olives and it was excellent as usual. Each year around my birthday I try to have a lunch at Piece.
Today (Wednesday) I went to Revolution Brewery on Milwaukee Blvd. This is a newish brewpub which I have visited before, and always ordered their pizza (which is good!). Today I wanted to try their burger.
 The Workingman burger I ordered comes with aged cheddar, beer onions, bacon, lettuce and tomato on a house made poppy seed bun. I asked for the burger to be cooked medium, and it came just as requested. This bun is MUCH better than the one at Old Town Social, when you squeeze down on the burger to take a bite the bun gives enough so that the toppings don't spill out the back. Yet it was sturdy enough to stand up to the drippings so it didn't fall apart. I have to say that the burger and toppings at Old Town Social were tastier, if you were to mix the bun at Revolution with the burger and fixings at OTS you would have an outstanding burger. Fries were good, not particularly crispy but not greasy either. It would have been nice to have some dipping sauce instead of ketchup, but that is excusable. I like mayonnaise or blue cheese dressing personally, but I guess I'm just a freak that way.
That's all for now, I'll add more mini-reviews of places as I visit them. Th main event will be a dinner at Tru on Thursday. Can't wait!
The first place I went to actually was before my vacation. Old Town Social is a bar that opened up ten months ago less than two blocks from where I live. It's on a section of North Avenue that I rarely walk by, and when driving by I figured it was just some kind of hook-up bar so I never took the time to go in. I began hearing things on the local boards about the house made sausages and cured meats, so last week I decided to walk over and try it out. The interior is nice, high ceilings, huge windows, wooden tables, high chairs and a huge bar. I took a seat at the bar and started looking over the fairly extensive list of draft and bottled beers. The first beer I tried was a New Belgium Ranger IPA. Very nice! I ordered some food to go, the special of the day was a duck andouille hoagie with a spicy aioli so I ordered one of those and an order of vidalia onion rings. I then had a Lagunitas IPA while I was waiting. Again a very nice hoppy beer! The food arrived and I quickly walked home.


Betty and I went back a few days later for dinner. I ordered the hamburger "their way", which includes cheddar, pickle, lettuce, tomato, house made bacon, aioli and a fried egg on a sesame seed roll. Betty had the B.L.T. and we ordered a boudin sausage and an order of fries on the side. The burger was good, flavors were all there, but it was cooked well over the medium I had ordered. I also wasn't a big fan of the bun, which I think was house made. It didn't have enough "give" so when I took a bite things started getting squeezed out the back. If they had a softer bun and could have cooked it to the right temperature it would have been superb. Betty liked the B.L.T. The fries were very good, crispy with a soft interior, but a little on the greasy side. I don't know about the boudin, Betty thought there was too much liver flavor in it and I wasn't a fan of the texture. The only reason we ordered it was because they were out the the duck andouille. There is still a lot on the menu I'd like to try, so I'll be back. In a few weeks when we have the Air and Water show and the Ginza Festival happening on the same weekend I'll be stuck in the neighborhood, so I'll go again.
OK, now on to the actual vacation... On Saturday I went to Goose Island, as I often do. Love their beers and the food at the Clyborne location is somewhat more upscale than their other location on Clark in Wrigleyville. I wasn't very hungry so I tried the rabbit rolls, which were very tasty. I pretty much go to Goose every Saturday to try out their new beer of the week and have lunch.
On Monday Betty and I went to 90 Miles Cuban Cafe. We had seen the location on Clybourn last year when we went to a play at the Viaduct Theater, but it was closed by the time the play let out. For this outing we went to the location at 2540 W. Armitage. I ordered the cubano sandwich and Betty ordered an special that the waiter recommended. It was chunks of pork which had been marinated in white wine and citrus, then deep fried and topped with a garlic sauce. It was very good and came with sweet plantains and a mix of black beans and rice. My cubano sandwich was forgettable. The bread was what you would expect for a cubano, but the interior was soggy as if it had been made earlier and reheated. The ham and the roast pork were used sparingly, and the sandwich was pretty bland. The version at Goose Island is much better. I wouldn't order one of their cubano sandwiches again, but I would try their dinners.
Tuesday I went to Piece. It's a brewery and pizzaria that specializes in New Haven style pizza. They have a lunch special which is an individual pizza with three toppings for $7.95. I chose pepperoni, suasage and black olives and it was excellent as usual. Each year around my birthday I try to have a lunch at Piece.
Today (Wednesday) I went to Revolution Brewery on Milwaukee Blvd. This is a newish brewpub which I have visited before, and always ordered their pizza (which is good!). Today I wanted to try their burger.

That's all for now, I'll add more mini-reviews of places as I visit them. Th main event will be a dinner at Tru on Thursday. Can't wait!
Monday, July 12, 2010
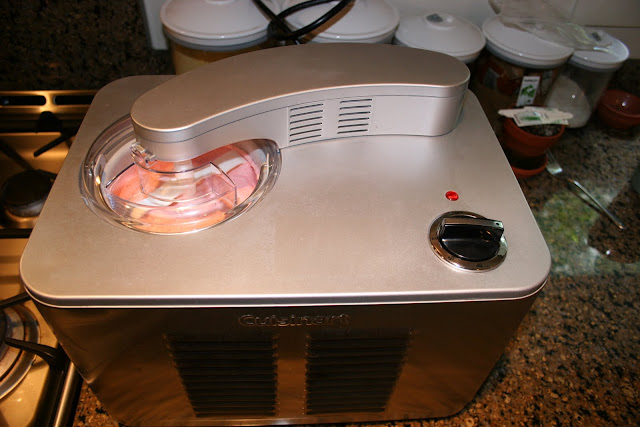
Cuisinart ICE-50 Supreme Ice Cream Maker.
A few weeks ago sellout.woot.com offered a refurbished Cuisinart ICE-50 ice cream maker as their deal of the day for $139. This model of ice cream maker has a compressor built in, so no more freezer bowls taking up limited space in the freezer and no more planning 24 hours ahead when I want to make a batch of ice cream. I had wanted this type of machine for a long time, but the normal price of $250 was a bit more than I was willing to pay for something I really didn't need. At $139 I was able to rationalize the purchase though, and so far I have been very happy with the purchase! I love Woot.com!
The shipping notice from sellout.woot.com had been filtered out by my mail server's spam filter, so when it arrived on Friday the 2nd I was completely unprepared. Earlier in the day I had walked to the Taste of Chicago, spent some time watching cooking demos and exploring the festival and then walked back home. All in all about 12-15 miles of walking which did a number on my legs and feet. While I would have liked to get started immediately making ice cream, I waited until the next day to go out and pick up some ingredients. I stopped by Costco and picked up some heavy cream. It's really cheap there, I believe it was $5.69 for a half gallon. When I got home I went about making the base for my first batch. I went with a basic french vanilla ice cream, the recipe is based on one from Cook's Illustrated, but I had to make a few modifications due to the ingredients I had on hand. The final recipe was...
2 cups heavy cream
1 cup skim milk
3/4 cup sugar
4 egg yolks
1 vanilla bean
1/8 tsp salt
To make the custard, combine the dairy, 1/4 cup of the sugar, salt and the vanilla bean which has been split and scraped. Put over heat and bring to a simmer. Meanwhile, whist the remaining 1/2 cup sugar with the 4 egg yolks until they become light and fluffy. Temper the hot cream in to the eggs by slowly pouring it in while whisking, then add back to the pot and return to the heat. stir constantly until the custard thickens at about 185 degrees. Cool the custard rapidly by straining it in to a bowl set over another bowl of ice and stirring until cold. Cover directly with plastic wrap and let sit in the refrigerator for at least four hours before churning.
Setting up the machine was pretty easy and straightforward. The base is poured in to the freezing bucket which is then lowered in to the unit. It's a pretty snug fit but not difficult to get in place. I assembled the paddle, lid and churning motor in one piece and lowered in to place. The churning motor is a separate electric motor that plugs in to a socket on the top. Then, all you have to do is plug in the ice cream maker and set the timer. One thing I noticed is that the churning motor is pretty loud! The instructions say it will take about 40 minutes to finish a batch, but in this case the motor stopped after about 30 minutes. The soft ice cream was packed in to gladware containers and placed in the freezer to harden. It was VERY good, strong vanilla flavor but not overpowering.
The following weekend I decided to make strawberry ice cream. This time I decided to make a Philadelphia style ice cream instead of a french style. While french style is an egg based custard, Philadelphia style contains no eggs and does not need to be cooked. The recipe I used is pretty simple and produced another VERY good final product.
1 pound fresh strawberries, hulled and chopped
3/4 cup sugar
1/8 tsp salt
2 cups cream
1/2 oz brandy
dash of vanilla extract
After the strawberries were chopped they were macerated in the 3/4 cup sugar and salt for several hours until they had given up a lot of juice. I then used an immersion blender to puree most of the berries, while leaving a few chunks intact. The cream was added along with the brandy and dash of vanilla.
Pureeing the berries gave the ice cream base a very attractive pink color without having to resort to artificial coloring. The finished product has a really good strawberry flavor, but isn't too sweet. I'm going to have a LOT of fun using this over the summer! At some point I'm going to look in to creating a low fat/low sugar ice cream that will be a nice non-guilty pleasure. I experimented a bit in culinary school with a base made of milk thickened with corn starch so I'll probably start there, but that was using a professional batch freezer which is a little more advanced than what I have here but I'm certain that it's possible!
The shipping notice from sellout.woot.com had been filtered out by my mail server's spam filter, so when it arrived on Friday the 2nd I was completely unprepared. Earlier in the day I had walked to the Taste of Chicago, spent some time watching cooking demos and exploring the festival and then walked back home. All in all about 12-15 miles of walking which did a number on my legs and feet. While I would have liked to get started immediately making ice cream, I waited until the next day to go out and pick up some ingredients. I stopped by Costco and picked up some heavy cream. It's really cheap there, I believe it was $5.69 for a half gallon. When I got home I went about making the base for my first batch. I went with a basic french vanilla ice cream, the recipe is based on one from Cook's Illustrated, but I had to make a few modifications due to the ingredients I had on hand. The final recipe was...
2 cups heavy cream
1 cup skim milk
3/4 cup sugar
4 egg yolks
1 vanilla bean
1/8 tsp salt
To make the custard, combine the dairy, 1/4 cup of the sugar, salt and the vanilla bean which has been split and scraped. Put over heat and bring to a simmer. Meanwhile, whist the remaining 1/2 cup sugar with the 4 egg yolks until they become light and fluffy. Temper the hot cream in to the eggs by slowly pouring it in while whisking, then add back to the pot and return to the heat. stir constantly until the custard thickens at about 185 degrees. Cool the custard rapidly by straining it in to a bowl set over another bowl of ice and stirring until cold. Cover directly with plastic wrap and let sit in the refrigerator for at least four hours before churning.
Setting up the machine was pretty easy and straightforward. The base is poured in to the freezing bucket which is then lowered in to the unit. It's a pretty snug fit but not difficult to get in place. I assembled the paddle, lid and churning motor in one piece and lowered in to place. The churning motor is a separate electric motor that plugs in to a socket on the top. Then, all you have to do is plug in the ice cream maker and set the timer. One thing I noticed is that the churning motor is pretty loud! The instructions say it will take about 40 minutes to finish a batch, but in this case the motor stopped after about 30 minutes. The soft ice cream was packed in to gladware containers and placed in the freezer to harden. It was VERY good, strong vanilla flavor but not overpowering.
The following weekend I decided to make strawberry ice cream. This time I decided to make a Philadelphia style ice cream instead of a french style. While french style is an egg based custard, Philadelphia style contains no eggs and does not need to be cooked. The recipe I used is pretty simple and produced another VERY good final product.
1 pound fresh strawberries, hulled and chopped
3/4 cup sugar
1/8 tsp salt
2 cups cream
1/2 oz brandy
dash of vanilla extract
After the strawberries were chopped they were macerated in the 3/4 cup sugar and salt for several hours until they had given up a lot of juice. I then used an immersion blender to puree most of the berries, while leaving a few chunks intact. The cream was added along with the brandy and dash of vanilla.

Pureeing the berries gave the ice cream base a very attractive pink color without having to resort to artificial coloring. The finished product has a really good strawberry flavor, but isn't too sweet. I'm going to have a LOT of fun using this over the summer! At some point I'm going to look in to creating a low fat/low sugar ice cream that will be a nice non-guilty pleasure. I experimented a bit in culinary school with a base made of milk thickened with corn starch so I'll probably start there, but that was using a professional batch freezer which is a little more advanced than what I have here but I'm certain that it's possible!
Wednesday, July 7, 2010
Fourth of July weekend
I took four days off for the holiday. On Friday I did my yearly excursion to Taste of Chicago. The main reason is to watch cooking demos at the Dominick's Cooking Corner and pick up some of the cookbooks they giveaway each year, I have every book from 1999 to 2010 except for the 2001 version which is MIA but probably somewhere in the house. Giuseppe Tentori of Boka was the one I really wanted to see, he did a grilled eggplant carpaccio with cherry tomatoes and fresh mozzarella which looks pretty good. I'll have to try making a version of it at home sometime soon. Every year I walk to and from the Taste, about 5 miles each way. That way I can eat anything I want without feeling too guilty, but my legs and feet pay for it over the next few days. After I got home from the Taste on Friday afternoon I went upstairs to my computer. The doorbell rang later that afternoon, and it took me so long to get on my feet and down to the door that I almost missed FedEx delivering a package I had ordered from Sellout.woot.com earlier in the week. I'm glad I was able to make it, the package contained my new Cuisinart ICE-50 ice cream maker! I'll write about that later.
On Saturday I started planning the menu for our July 5th cookout. Steaks are the tradition, so I went to Costco and found some nicely marbled USDA prime ribeyes. These were BIG steaks! About 2" thick and 1 1/2 pounds apiece. When I got home I seasoned each steak with pepper and garlic, then placed them on a cooling rack and let sit in the refrigerator for 2 days loosely covered with paper towels to allow a bit of the natural moisture to evaporate. Not quite the same as dry aging, but it does improve the flavors IMO. I decided to cook the steaks sous vide this year, so the morning of the cookout I salted both sides of the steaks, vacuum sealed them and put them in the freezer. Since there were only three of us and we would be making some baked salmon as well, I only needed to cook one of the steaks. The immersion circulator was set up and set to 135 degrees. The steak was placed in to the water bath frozen and left for about 4 hours before being removed and allowed to cool a bit in the bag. I lit a full chimney of charcoal and dumped it all on one side of the grill once it was ready, then evened out the coals with a trowel and threw on a handful of soaked cherry wood chips. The steak was de-bagged, dried off and coated with a liberal amount of oil before being placed on the grill. About a minute per side produced a really nice crust, and since the meat had been allowed to cool off a bit before searing the interior remained a perfect medium rare. I really love this cooking method. Outstanding results that rival the best steakhouses, and I have two more in the freezer ready to go! The salmon was made simply by spreading a little mustard and seasoning on top, then cooking it in the toaster oven in some heat-proof plates we have. Nothing could be simpler and just one plate to clean!
For sides we had corn of the cob, green beans and french fries. The corn was simple, I cut of the ends and immediately submerged them in a salt/sugar brine. The corn was then grilled until some of the kernels were slightly caramelized, then dressed with a drizzle of really good olive oil from Old Town Oil. Since it had been soaked in brine, no additional seasoning was needed. The green beans where simply steamed in the microwave for about 4 minutes and seasoned with some salt, pepper and garlic.
French fries may sound like a strange choice, but a well done fry can be sublime. The process starts by cutting russet potatoes in to 3/8" batons and immediately placing them in cold water. Once all the potatoes were cut, I rinsed them in several changes of water, then covered them again and put the bowl in the refrigerator overnight. About an hour before serving the meal, I filled my fryer with oil and heated it up to 325 degrees. The potatoes were drained and dried on paper towels to get as much moisture off them as possible. This is important if you don't want to be wiping oil off of everything later. The dried fries were placed in the fryer and cooked for about 5-6 minutes until they just started to get brown on the edges. Then they were removed and allowed to cool down on a paper lined sheet pan. Meanwhile, the oil in the fryer is increased to 375 degrees. While it was heating up I mixed salt, pepper, finely minced garlic and finely minced rosemary in a small bowl. Once the oil reached temperature, the fries were placed back in the fryer and cooked until they were golden brown. When done they were put in a bowl, tossed with the salt/pepper/garlic/rosemary mix, and placed on a paper towel lined plate to drain. It's important to season fried food as soon as they get out of the oil, the seasonings tend to stick better than if it is done later. These fries were perfect, crisp on the outside with an almost creamy interior. No ketchup necessary!
We have two cats named Pika and Boo. For some unknown reason their nicknames are Peach and Booberry, so I made a blueberry and peach pie as a dessert. This was a Sandra Lee moment, so don't shoot me. I made an all butter pate brisee, rolled it out and lined a pie tin. The filling started with a can of pre-made blueberry pie filling which I topped with slices of canned peaches that had been drained. The syrup from the peaches was mixed with tapiocca flour and cinnamon and poured over the peaches. I made a crumble topping by crushing some lemon snaps, mixing with some butter and cinnamon and sprinkling over the top. The oven was heated to 400 degrees with a pizza stone in place and the pie was placed directly on the hot stone to help cook the bottom layer of crust. By the time we were ready to eat the pie, it had cooled but was still warm. It was served with homemade vanilla ice cream made made in the new Cuisinart and chantilly cream. I plan on posting about the new ice cream maker sometime in the near future. All in all an excellent meal!
On Saturday I started planning the menu for our July 5th cookout. Steaks are the tradition, so I went to Costco and found some nicely marbled USDA prime ribeyes. These were BIG steaks! About 2" thick and 1 1/2 pounds apiece. When I got home I seasoned each steak with pepper and garlic, then placed them on a cooling rack and let sit in the refrigerator for 2 days loosely covered with paper towels to allow a bit of the natural moisture to evaporate. Not quite the same as dry aging, but it does improve the flavors IMO. I decided to cook the steaks sous vide this year, so the morning of the cookout I salted both sides of the steaks, vacuum sealed them and put them in the freezer. Since there were only three of us and we would be making some baked salmon as well, I only needed to cook one of the steaks. The immersion circulator was set up and set to 135 degrees. The steak was placed in to the water bath frozen and left for about 4 hours before being removed and allowed to cool a bit in the bag. I lit a full chimney of charcoal and dumped it all on one side of the grill once it was ready, then evened out the coals with a trowel and threw on a handful of soaked cherry wood chips. The steak was de-bagged, dried off and coated with a liberal amount of oil before being placed on the grill. About a minute per side produced a really nice crust, and since the meat had been allowed to cool off a bit before searing the interior remained a perfect medium rare. I really love this cooking method. Outstanding results that rival the best steakhouses, and I have two more in the freezer ready to go! The salmon was made simply by spreading a little mustard and seasoning on top, then cooking it in the toaster oven in some heat-proof plates we have. Nothing could be simpler and just one plate to clean!
For sides we had corn of the cob, green beans and french fries. The corn was simple, I cut of the ends and immediately submerged them in a salt/sugar brine. The corn was then grilled until some of the kernels were slightly caramelized, then dressed with a drizzle of really good olive oil from Old Town Oil. Since it had been soaked in brine, no additional seasoning was needed. The green beans where simply steamed in the microwave for about 4 minutes and seasoned with some salt, pepper and garlic.
French fries may sound like a strange choice, but a well done fry can be sublime. The process starts by cutting russet potatoes in to 3/8" batons and immediately placing them in cold water. Once all the potatoes were cut, I rinsed them in several changes of water, then covered them again and put the bowl in the refrigerator overnight. About an hour before serving the meal, I filled my fryer with oil and heated it up to 325 degrees. The potatoes were drained and dried on paper towels to get as much moisture off them as possible. This is important if you don't want to be wiping oil off of everything later. The dried fries were placed in the fryer and cooked for about 5-6 minutes until they just started to get brown on the edges. Then they were removed and allowed to cool down on a paper lined sheet pan. Meanwhile, the oil in the fryer is increased to 375 degrees. While it was heating up I mixed salt, pepper, finely minced garlic and finely minced rosemary in a small bowl. Once the oil reached temperature, the fries were placed back in the fryer and cooked until they were golden brown. When done they were put in a bowl, tossed with the salt/pepper/garlic/rosemary mix, and placed on a paper towel lined plate to drain. It's important to season fried food as soon as they get out of the oil, the seasonings tend to stick better than if it is done later. These fries were perfect, crisp on the outside with an almost creamy interior. No ketchup necessary!
We have two cats named Pika and Boo. For some unknown reason their nicknames are Peach and Booberry, so I made a blueberry and peach pie as a dessert. This was a Sandra Lee moment, so don't shoot me. I made an all butter pate brisee, rolled it out and lined a pie tin. The filling started with a can of pre-made blueberry pie filling which I topped with slices of canned peaches that had been drained. The syrup from the peaches was mixed with tapiocca flour and cinnamon and poured over the peaches. I made a crumble topping by crushing some lemon snaps, mixing with some butter and cinnamon and sprinkling over the top. The oven was heated to 400 degrees with a pizza stone in place and the pie was placed directly on the hot stone to help cook the bottom layer of crust. By the time we were ready to eat the pie, it had cooled but was still warm. It was served with homemade vanilla ice cream made made in the new Cuisinart
Friday, June 18, 2010
A really good whole wheat sandwich bread.
Last month I was visiting family in Kentucky and made a trip to Midway to visit Weisenberger MIll and pick up some bread flour. Their flours are excellent, if you're in the area and like baking you should make the trip. You can also order off their website but the shipping makes that a little expensive. I asked for 10 pounds of their bread flour and 5 pounds of a blend flour I had seen on the website. The blend is a mix of whole wheat and bread flours, and since I'm trying to eat a little healthier I wanted to try it out. My first attempt over the weekend actually turned out really good, so I thought I'd post the recipe and procedure...
This is the formula.
500 grams (100%) whole wheat blend flour
300 grams (60%) cool water (I use filtered water)
10 grams (2%) honey (also purchased at the mill)
5 grams (1%) Instant Dry Yeast (IDY)
20 grams (4%) softened butter
10 grams (2%) salt
10 grams Melted butter for top (optional)
First I mixed the water with the honey, yeast and 200 grams of the flour. The pats of softened butter were placed on top of that, followed by the rest of the flour and the salt. The flour was leveled off and the bowl set aside for about 20 minutes. The resting allows the yeast to start working and allows gluten to start forming in the flour/water mix at the bottom of the bowl. I then kneaded the dough on the Kitchenaid until it was smooth. The dough was wet, but easy to handle. It was rounded, placed back in the bowl and covered with plastic wrap for the first ferment. Rising was going pretty quick, so I punched the dough down a few times before shaping and putting in a large (9" x 5") loaf pan to rise (covered with plastic wrap). When the rise was done, I made a slash on the top with a Baker's Blade
 and poured 10 grams of melted butter in the slash and over the top. The loaf was baked in a 375 degree oven for about 20 minutes. The temperature of the loaf when it was done was around 200 degrees. I depanned the bread immediately as it came out of the oven and allowed it to cool completely on a wire rack. Once cool, the loaf was put in a plastic bag.
This bread was sturdy enough to stand up to whatever you want to put on it, had a great flavor and made excellent toast. Try it out!
This is the formula.
500 grams (100%) whole wheat blend flour
300 grams (60%) cool water (I use filtered water)
10 grams (2%) honey (also purchased at the mill)
5 grams (1%) Instant Dry Yeast (IDY)
20 grams (4%) softened butter
10 grams (2%) salt
10 grams Melted butter for top (optional)
First I mixed the water with the honey, yeast and 200 grams of the flour. The pats of softened butter were placed on top of that, followed by the rest of the flour and the salt. The flour was leveled off and the bowl set aside for about 20 minutes. The resting allows the yeast to start working and allows gluten to start forming in the flour/water mix at the bottom of the bowl. I then kneaded the dough on the Kitchenaid until it was smooth. The dough was wet, but easy to handle. It was rounded, placed back in the bowl and covered with plastic wrap for the first ferment. Rising was going pretty quick, so I punched the dough down a few times before shaping and putting in a large (9" x 5") loaf pan
This bread was sturdy enough to stand up to whatever you want to put on it, had a great flavor and made excellent toast. Try it out!
Saturday, June 12, 2010
Hamburgers sous vide
Welcome back to my continuing series "Making Simple Things Complicated"! In out last episode, we tackled potato salad, the potatoes were excellent but there was room for improvement in the dressing. Today, we look at the hamburger. My original interest in this was to see if I could use sous vide to make a juicy, flavorful hamburger out of low fat meat. But while I was at the supermarket I saw this.

 My focus changed to seeing what could be done with the cheapest of meats using the sous vide method. The hamburger patties pictured to the left cost $2.68. But since they were almost out of date the price was 50% off, or about $0.46 per 1/3rd pound patty. This hamburger was 80% lean and 20% fat, a ratio I prefer to use when cooking the traditional method since it doesn't dry out like lower fat meat does.
To prep the burgers, I first seasoned both sides with pepper and granulated garlic. No salt at this time. I had searched for pages on cooking hamburgers using the sous vide method, freezing the patties prior to vacuum sealing was recommended for several reasons. First, frozen patties don't lose their shape when being sealed in the vacuum bags. Trying to do this with unfrozen burgers results in the edges getting squashed. Second, several posts indicated that starting from a frozen state resulted in firmer texture in the finished product. Burgers cook from an unfrozen state tended to fall apart on the grill/griddle and stick.

 The patties were allowed to freeze for a couple of hours, then I salted both sides (the salt had to be pressed in to keep it from falling off), the patties were sealed in vacuum bags and placed back in the freezer until the water bath was ready. I filled up my 48 quart cooler with cold tap water, moved it to the floor of the living room and mounted the immersion circulator. I set the temperature for 56 degrees celcius (132.8 farenheit) and waited for the bath to warm to temp. The large cooler is great for doing big things, but I really need to find a smaller one for these experiments. It takes a long time to heat up that much water! Anyway, once the water was at the set temperature, I took the vacuum packed frozen patty out of the freezer and put it directly in the bath. Cooking time was about an hour, then the hamburger was removed and allowed to cool for a few minutes before being depouched. Not real attractive, huh? Paper towels were used to pat off the accumulated juices while the griddle was heated up as hot as I could get it. A little butter was put on the griddle and used to toast a bun, then the hamburger was put on the griddle to sear on both sides. It had been about 15 minutes since removal from the water bath, so the patty had a chance to cool down a bit. At the same time I griddled a slice of vidalia onion. After a minute on the first side, the burger was flipped and I put on a slice of medium cheddar cheese to melt. Another minute and it was time to assemble the burger.

The final burger consisted of a nicely toasted bun, two slices of medium cheddar cheese, a slice of nice, ripe tomato, the griddled vidalia onion, leaf lettuce, mayo and dijon mustard.
The burger itself was perfectly rare/medium-rare throughout, juicy and flavorful. Probably one of the best burgers I've had in a long time, all for a total ingredient cost of $1.35 per burger (and everything besides the beef was good quality!). Since the patties were preformed there wasn't actually much prep work either and cooking from frozen means I can have a supply of burgers frozen and ready to go at a moments notice. This experiment in sous vide is a resounding success! I'm anxious to see if it can produce similarly excellent results with low-fat hamburger!

 My focus changed to seeing what could be done with the cheapest of meats using the sous vide method. The hamburger patties pictured to the left cost $2.68. But since they were almost out of date the price was 50% off, or about $0.46 per 1/3rd pound patty. This hamburger was 80% lean and 20% fat, a ratio I prefer to use when cooking the traditional method since it doesn't dry out like lower fat meat does.
 To prep the burgers, I first seasoned both sides with pepper and granulated garlic. No salt at this time. I had searched for pages on cooking hamburgers using the sous vide method, freezing the patties prior to vacuum sealing was recommended for several reasons. First, frozen patties don't lose their shape when being sealed in the vacuum bags. Trying to do this with unfrozen burgers results in the edges getting squashed. Second, several posts indicated that starting from a frozen state resulted in firmer texture in the finished product. Burgers cook from an unfrozen state tended to fall apart on the grill/griddle and stick.

 The patties were allowed to freeze for a couple of hours, then I salted both sides (the salt had to be pressed in to keep it from falling off), the patties were sealed in vacuum bags and placed back in the freezer until the water bath was ready. I filled up my 48 quart cooler with cold tap water, moved it to the floor of the living room and mounted the immersion circulator. I set the temperature for 56 degrees celcius (132.8 farenheit) and waited for the bath to warm to temp. The large cooler is great for doing big things, but I really need to find a smaller one for these experiments. It takes a long time to heat up that much water! Anyway, once the water was at the set temperature, I took the vacuum packed frozen patty out of the freezer and put it directly in the bath. Cooking time was about an hour, then the hamburger was removed and allowed to cool for a few minutes before being depouched. Not real attractive, huh? Paper towels were used to pat off the accumulated juices while the griddle was heated up as hot as I could get it. A little butter was put on the griddle and used to toast a bun, then the hamburger was put on the griddle to sear on both sides. It had been about 15 minutes since removal from the water bath, so the patty had a chance to cool down a bit. At the same time I griddled a slice of vidalia onion. After a minute on the first side, the burger was flipped and I put on a slice of medium cheddar cheese to melt. Another minute and it was time to assemble the burger.

The final burger consisted of a nicely toasted bun, two slices of medium cheddar cheese, a slice of nice, ripe tomato, the griddled vidalia onion, leaf lettuce, mayo and dijon mustard.
The burger itself was perfectly rare/medium-rare throughout, juicy and flavorful. Probably one of the best burgers I've had in a long time, all for a total ingredient cost of $1.35 per burger (and everything besides the beef was good quality!). Since the patties were preformed there wasn't actually much prep work either and cooking from frozen means I can have a supply of burgers frozen and ready to go at a moments notice. This experiment in sous vide is a resounding success! I'm anxious to see if it can produce similarly excellent results with low-fat hamburger!
Tuesday, June 1, 2010
Potato salad sous vide
I was sitting around last week, wondering what simple recipe I could unnecessarily complicate while at the same time making use of my new (old) immersion circulator. Then it hit me! And after I woke up and was unable to find out who had thrown the brick I decided to make potato salad sous vide!
My normal potato salad recipe (or potatoe salad if you are an ex-vice president) involves boiling the potatoes, draining them and dressing the still hot spuds with a mixture of mustard and pickle juice. The potatoes are cooled and mixed with a mayonnaise based dressing. For the sous vide version, I made a similar vinaigrette with the mustard and pickle juice and added some salt, pepper, dill and garlic. The red potatoes were diced, tossed with the vinaigrette and sealed in a vacuum bag. I did this a few days before Memorial Day, so the sealed potatoes were put in the fridge until the next day.
On cooking day, the cooler was filled with water and the immersion circulator was set to 83.9 degrees Celsius (183 degrees Fahrenheit). This is there I ran in to a problem, the surface area of the water pool is so large that the evaporative cooling was preventing the bath from reaching the set temperature. To remedy this I just took some aluminum foil and covered the cooler as well as possible. For the next time, I'm cutting some Styrofoam cooler lids to fit the top of the Igloo cooler with the circulator in place. Once the desired temperature was reached the bag of potatoes was added and the foil replaced. Three hours later, the potatoes were removed and put in the refrigerator to cool until the next day.
A few hours before dinner, I mixed mayonnaise, sambal, diced onion, diced celery, diced gherkins, dill, salt, pepper and a little pickle juice for the dressing. The sous vide potatoes were added and everything mixed together. The final results were OK, the texture and flavor of the potatoes were excellent but because no moisture was lost from the potatoes during the cooking process the dressing ended up a little on the loose side. The next time I try this I'm going to remove the potatoes from the bag as soon as they come out of the bath and spread them out on a sheet pan to allow some of the water to evaporate. We also had filet mignon steaks (cooked at 57.2 degrees celcius/135 degrees Fahrenheit) for 90 minutes and seared in a cast iron skillet for a few minutes a side for a crust (it was storming outside, so no grill), roasted beets, a bleu cheese with caramelized onion facaccia and a peach and blueberry cobbler for dessert. All in all, a successful holiday dinner. Now what to do for July 4th?
Wednesday, May 26, 2010
Making pizza with a 2Stone Pizza Grill (Moved from Blahg Tech)
A few years ago, a thread was started on PizzaMaking.com entitled "Reverse engineered coal fired brick oven". The OP had created a pizza oven to fit on his Weber charcoal grill which mimicked the conditions and high temperatures found in a traditional coal fired brick oven. The thread can be found here...
Reverse engineered coal fired brick oven
I was really (and I mean REALLY) in to pizza at the time, so the oven intrigued me. Before long I had placed my order and shortly thereafter received my 2Stone Pizza Grill. The weather has been improving here in Chicago, so I decided to make some pizza for dinner last night.

To make a really great pizza you need to start at the bottom, the crust. To stand up to the high temperatures a dough with a higher than usual hydration (water content) works best. The dough formula I use for pizzas baked in my home oven (expressed in bakers percentages, I'll explain that later) is...
100% bread flour
60% to 62% cold water
2% salt
0.25% Instant Dry Yeast (IDY)
This is mixed in the Kitchenaid stand mixer, balled, rubbed down with oil and left to ferment in the refrigerator for 24-48 hours before use. The dough I use for the 2Stone oven is this...
100% Caputo "00" pizzaria flour
70%-72% cold water
2% salt
0.25% -0.5% IDY
2% Extra Virgin Olive Oil
The "00" flour I use is imported from Italy and is milled finer than American flours. When I tried using American brands of flour such as King Arthur I had issues with the crusts sticking to the stone and burning, those problems have disappeared since I started using the Italian "00" flour. It can be difficult to find a local supplier for this type of flour, but you can order it from Amazon 00 Pizza Flour Attimo Caputo or PennMac.com. The method I use to make this dough it to make a sponge with the water, yeast and ~ 70% of the flour, which I cover and let ferment all day while I'm at work. If I want to use it that night I use a higher percentage of yeast, but if I'm going to let the finished dough sit in the fridge until the next day (which does seem to improve flavor and texture) I will use the lower percentage of yeast. When I get home from work I add the remaining flour and mix for ~ 2 minutes, then add the oil and continue mixing until the dough is smooth. At that point the dough is dumped out on to a floured surface, rolled in to a ball (which can be tricky with a dough this loose!) and placed in a covered, oiled bowl to rise until needed.
The formulas posted above are in baker's percentages. The weights of all ingredients are expressed as a percentage of the weight of the flour, which will always be 100%. If more than one type of flour is used then the weights of the flours combined will equal 100%. The reason that this method is preferred in commercial bakeries is that it makes it very easy to scale recipes up and down according to need. The way to do this is simple. First, you need to add all the percentages in a particular formula together. For the dough formula above you add all the percentages (100% + 70% + 2% + 0.25% + 2% = 174.25%). Convert that in to an integer and you get a conversion factor of 1.7425. Now that you have that number, you can use to to find out the weight of flour required for any given weight of final dough. Say you need 850 grams of pizza dough, just divide 850 by 1.7425 and you see that you'll need 487.8 grams of flour. 70% of 487.8 = 341.46 grams of water and so on.
Now that the dough was done and rising, it was time to set up the 2Stone. I lit a chimney of charcoal and let it go until the coals on top started to turn white. The chimney was dumped and I arranged the coals in even layer in the center of the grill, roughly 2" high and 13" square. The 2Stone was then placed on the cooking grate over the coals and allowed to heat up with the grill cover placed on top.

 I can usually get the oven up to 900-950 degrees, but I was hungry, I was impatient and I only had enough charcoal to fill the chimney 3/4 of the way. Now it was time to stretch the dough, dress the pizza, cook and enjoy!


I was lazy on the sauce, it was just a store bought brand (Boboli) that I dressed up with oregano, basil, vinegar, sugar and oil. There were some left over vegetables that I had grilled the night before (mushrooms, onions and peppers) that I diced up and added after saucing the dough, then topped with slices of whole milk mozzarella and finished with slices of Ezzo pepperoni I bought from Pennmac.com. After baking I picked a few leaves of Basil off my AeroGrow and tore them over the top and drizzled the pie with some really good olive oil from Old Town Oil. I have enough leftover dough in the fridge to do it again tonight if the weather cooperates!
The creator of this product has been making improvements and new models of this oven. He sells them via his website, www.2Stonepg.com.
Reverse engineered coal fired brick oven
I was really (and I mean REALLY) in to pizza at the time, so the oven intrigued me. Before long I had placed my order and shortly thereafter received my 2Stone Pizza Grill. The weather has been improving here in Chicago, so I decided to make some pizza for dinner last night.

To make a really great pizza you need to start at the bottom, the crust. To stand up to the high temperatures a dough with a higher than usual hydration (water content) works best. The dough formula I use for pizzas baked in my home oven (expressed in bakers percentages, I'll explain that later) is...
100% bread flour
60% to 62% cold water
2% salt
0.25% Instant Dry Yeast (IDY)
This is mixed in the Kitchenaid stand mixer, balled, rubbed down with oil and left to ferment in the refrigerator for 24-48 hours before use. The dough I use for the 2Stone oven is this...
100% Caputo "00" pizzaria flour
70%-72% cold water
2% salt
0.25% -0.5% IDY
2% Extra Virgin Olive Oil
The "00" flour I use is imported from Italy and is milled finer than American flours. When I tried using American brands of flour such as King Arthur I had issues with the crusts sticking to the stone and burning, those problems have disappeared since I started using the Italian "00" flour. It can be difficult to find a local supplier for this type of flour, but you can order it from Amazon
The formulas posted above are in baker's percentages. The weights of all ingredients are expressed as a percentage of the weight of the flour, which will always be 100%. If more than one type of flour is used then the weights of the flours combined will equal 100%. The reason that this method is preferred in commercial bakeries is that it makes it very easy to scale recipes up and down according to need. The way to do this is simple. First, you need to add all the percentages in a particular formula together. For the dough formula above you add all the percentages (100% + 70% + 2% + 0.25% + 2% = 174.25%). Convert that in to an integer and you get a conversion factor of 1.7425. Now that you have that number, you can use to to find out the weight of flour required for any given weight of final dough. Say you need 850 grams of pizza dough, just divide 850 by 1.7425 and you see that you'll need 487.8 grams of flour. 70% of 487.8 = 341.46 grams of water and so on.
Now that the dough was done and rising, it was time to set up the 2Stone. I lit a chimney of charcoal and let it go until the coals on top started to turn white. The chimney was dumped and I arranged the coals in even layer in the center of the grill, roughly 2" high and 13" square. The 2Stone was then placed on the cooking grate over the coals and allowed to heat up with the grill cover placed on top.


I was lazy on the sauce, it was just a store bought brand (Boboli) that I dressed up with oregano, basil, vinegar, sugar and oil. There were some left over vegetables that I had grilled the night before (mushrooms, onions and peppers) that I diced up and added after saucing the dough, then topped with slices of whole milk mozzarella and finished with slices of Ezzo pepperoni I bought from Pennmac.com. After baking I picked a few leaves of Basil off my AeroGrow and tore them over the top and drizzled the pie with some really good olive oil from Old Town Oil. I have enough leftover dough in the fridge to do it again tonight if the weather cooperates!
The creator of this product has been making improvements and new models of this oven. He sells them via his website, www.2Stonepg.com.
Sous vide at home
The literal translation of "sous vide" is "under vacuum". The cooking techinque, which has been around since the mid-70's, involves sealing food items in vacuum bags and cooking them by immersion in a water bath (or other liquid) held at a precise temperature. The technique can produce interesting and tasty changes in texture and flavor when used properly. First, since the items being cooked are sealed in a vacuum bag there is no loss of moisture, flavors or nutrients. Second, since the temperature is precisely controlled there is no chance of overcooking the food. Finally, the texture of the food items can change noticeably due to the vacuum sealing. This depends on a lot of factors such as original density, temperature of the bath and cooking time.
When I was in culinary school we did discuss sous vide cooking, for about 10 minutes. The equipment to do it properly is expensive and the school wasn't willing to make the investment. The closest thing we did was poaching salmon in 120-130 degree olive oil. Lately I've become more interested in trying this technique so I started looking for the equipment.
The basic equipment for cooking sous vide includes a vacuum sealer (which I already had), a container to hold the bath and a way to maintain a constant temperature. One way would be to use a good thermometer to monitor a pot of water on the stove and manually maintain the temperature. This isn't very appealing if you plan on cooking items that require very long exposure times like short ribs. On the other end are all-in-one sous vide systems like the SousVide Supreme
  , but it is a little more money than I wanted to spend. What I chose to do is look in to immersion circulators
 . These are also expensive, but I found instructions on a DIY immersion circulator by The Seattle Food Geek. While browsing through Ebay for the parts, I noticed that there were a lot of older models being offered and I bid on an old Fisher Scientific 7300 immersion circulator...and lost. But a few days later, I received a second chance offer from the seller who said he had another one available. I snapped it up and another few days later it arrived.
 The box arrived on a day I had taken off work, so I was able to play around with it immediately. When I set it up in a pot of water and turned it on, it was VERY loud. It was also causing the GFCI in the kitchen to flip off. After disassembling the unit and giving it a thorough cleaning the noise problem was solved, but it still has an issue with GFCI. No problem, as long as it isn't plugged in to a kitchen or bathroom outlet everything works fine! The next day I started my first vacation in over a year, but since I was going to visit family I just brought along my new toy so I could continue to play. I found an old 48 quart Igloo cooler in my parents basement that served well as the water bath.
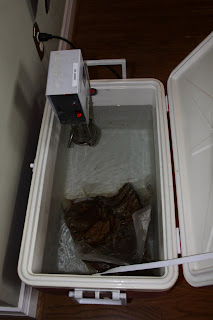 My first foray in to sous vide was pork back ribs. I made a rub using whatever appropriate spices I could find, applied it to the ribs and sealed them up in vacuum bags. The ribs were placed in a 150 degree water bath and allowed to stay there for about 14 hours before being removed and placed in the refrigerator to cool. That was a nervous night, I had never run the circulator for so long and didn't know if it could take the abuse and the cooler I was using for the bath had a drain on the bottom that I was afraid would pop open due to the temperature and flood the room. I read somewhere that chilling the ribs in the pouches after cooking allows the meat to firm up, no idea if this step is actually needed or not. I had always been told that collagen breaks down to gelatin at a little below boiling temperature, but the huge amounts of gelatin present when the bags were opened the next day proved that is wrong. The ribs were dried off and heated up on a hot grill to produce a nice crust. The meat was still pinkish, which some members of the family didn't like, but it was extremely tender and moist.
 The next thing I tried was filet mignon. They were seasoned with garlic salt and a product called Dale's Seasoning Sauce
 , which is mostly soy sauce and spices. We sealed them in the vacuum bags and let them sit 24 hours in the refrigerator. The next day, I set the immersion circulator to 135 degrees and let the steaks cook for 2 hours. They were allowed to cool a little bit before being removed from the bags and seared on the grill for about 45 seconds per side. They were incredible...fork tender and cooked to a perfect medium rare all the way through.
 When I returned home, the first thing was to get another cooler, preferrably one without a drain. I found another Igloo cooler for $20 that is a perfect fit for the circulator's mounting bracket. It is also 48 quart so there is enough room for just about anything I want to cook and has no drain at the bottom. More difficult to empty, but I'll be able to sleep better when it the circulator is running. My first dish cooked at home was sous vide salmon. First i put a tablespoon of olive oil in the bag and put it in the freezer until the oil had solidified. The salmon was seasoned simply with Lawry's Seasoned Pepper, lemon juice and fresh dill. The bath was set to 122 degrees and the cooking time was 40 minutes. The fish was removed from the bag and the skin side was seared briefly in olive oil to crisp it up a bit. The texture and flavor were amazing! I served it with some sauteed spinach for a very tasty and healthy meal. Next up? I'm thinking of cooking some potatoes sous vide for a Memorial Day potato salad.
When I was in culinary school we did discuss sous vide cooking, for about 10 minutes. The equipment to do it properly is expensive and the school wasn't willing to make the investment. The closest thing we did was poaching salmon in 120-130 degree olive oil. Lately I've become more interested in trying this technique so I started looking for the equipment.
The basic equipment for cooking sous vide includes a vacuum sealer


Subscribe to:
Posts (Atom)