Tuesday, March 31, 2020

Finally back

After a year of dental work I finally got my full set of choppers back at the end of February, then the world went to crap.  Now we're in the midst of a stay-at-home order and are practicing social distancing, bars and restaurants are closed for dine-in but some are offering pick-up and delivery to try and keep afloat.  I fear many of the small mom-and-pop places won't be able to reopen once this pandemic has run its course, all we can do is try to support them and their staff by ordering pick-up when possible and donating to the various funds set up to support the front of house staff who are trying to find ways to wait this thing out.

Since the last post I've added a few new toys for my Camp Chef DLX pellet grill that I haven't really been able to play with, the first being the Sidekick side burner.  It came with a griddle and will fit a number of other accessories, I later picked up their Grill Box for searing and was later pleased to discover that my 2Stone Pizza Grill seems to fit on the Sidekick pretty well.  I'm still debating on whether to use that for pizza of get the Pizza Oven accessory made specifically for the Sidekick, I htink the Camp Chef Pizza Oven Box would fit a bit more securely to the Sidekick so I'm leaning that way.

The other thing I've been working on lately is my pizza dough formula, I'm currently using a recipe based on one from Pizzeria Beddia I found on-line.  Mine's a little bit different than the original recipe in that I use a preferment.  The recipe I'm using is:

Preferment:
200 grams  Water
200 grams  Bread flour
0.5 gram     IDY

Mix together until combined and let sit overnight or up to 24 hours.  Sometimes if I have a recently emptied bottle of bottle conditioned or unfiltered ale I'll swish the water around in it to pick up any remaining yeast cells for the preferment, but if you want to have the same product each time that adds too many variables.

Once the preferment has prefermented I add:

155 grams  Water
8.4 grams   Sugar
0.5 grams   IDY
14.3 grams Olive oil
310 grams  Bread flour

Knead until the dough comes together as a shaggy mass, then cover and let sit for 30 minutes.  This autolyse step gives time for the flour to fully hydrate and for enzymes to activate.  Once the autolyse is done start kneading on low for about 2-3 minutes or until the dough starts to get smooth, ten add:

15 grams   Fine sea salt

Continue kneading for another 2-3 minutes to incorporate the salt.

At this point I'll portion the dough (this makes 2 - 3 pizzas depending on the size you want), round the balls and place them in oiled bowls or bags to ferment.  For same day you can let it ferment at room temperature for about 2-3 hours or you can put the dough in the refrigerater to cold ferment for up to 3 days.  In my opinion cold fermentation results in better flavor development and a dough that is easier to stretch but the warm fermented one is still pretty good!  I'm not sure how this dough will work with the higher temps possible with the Sidekick and either my 2Stone Pizza Grill or the Camp Chef Pizza Oven accessory, I may need to cut down on the sugar to prevent over-browning but that experiment will have to wait until it gets a bit warmer out.

Stay healthy!

Monday, August 19, 2019

Ginza Festival Teriyaki Chicken, Sous Vide

The Midwest Buddhist Temple in Chicago throws an annual Japanese food and culture event called the Ginza Festival.  One thing people flock to the Ginza Festival each year is their famous teriyaki chicken, unfortunately I was unable to partake this year due to some dental surgery a few days before the event so I decided I would make some myself once I was cleared to resume eating a normal diet.

The Midwest Buddhist Temple prints a recipe booklet for each year's festival and it always includes their teriyaki chicken recipe, originating from Chef Tony Naito it can be found online on local news websites and blogs.  Basically the recipe calls for marinating the chicken in teriyaki sauce overnight, then putting everything in a pan and simmering the chicken in the sauce covered for about 20 minutes.  Finally your finish the chicken on a charcoal grill while basting with the reduced sauce.  I decided to utilize sous vide to ensure the chicken would come out moist and juicy.

First step is making the sauce, the ingredients are...

3/4 cup soy sauce (I used low sodium)
1/2 cup brown sugar, packed
1/4 cup sweet red wine 
1" ginger, grated
1-2 garlic cloves, crushed

The original recipe uses Mogen David Concord Grape wine but I didn't find any at the grocery store so I went with a merlot.

Put all ingredients in a saucepan and heat until the sugar is dissolved.  Allow to cool to room temp.

At the festival they use 1/2 chickens, but since bone-in, skin on chicken thighs were on sale at the local supermarket I opted for those.  The chicken and cool teriyaki sauce were vacuum sealed together using my VacMaster VP215 Chamber Vacuum Sealer.  Chamber sealers have an advantage here because they make it much easier to seal liquids in the bags, if using a suction sealer like a FoodSaver you could freeze the marinade in ice cube trays and just seal the frozen cubes up with the chicken.  Once the marinade cubes thaw you would just need to massage the bags to make sure the marinade is well distributed.  The bags of chicken were then put in the refrigerator to marinate over night.  The next morning I filled up a 12 quart Cambro  with water, attached my Joule immersion circulator and opened up the Joule app to set the bath temperature to 163°f.  Once the bath was up to temp the bags of chicken went in and the timer was set for 3 hours.  When the time was up the bags were removed from the bath and chilled down before going in the refrigerator until later in the day.

It was a dark and stormy day, so I had to finish the chicken indoors instead of on the Weber as I had intended.  The chicken thighs were removed from the bags and patted dry.  I drained the purge in to a saucepan and put it over medium heat to start reducing.  This stuff is pretty high in sugar so it'll boil over if you don't keep an eye on it.  A separate non-stick skillet was put over medium high heat and filmed with a little oil.  Once the oil was shimmering and just about to start smoking the chicken thighs were put in skin side down to brown.  They only took about 2 minutes for the skin to get browned and crispy, they were then flipped over and the now reduced marinade was added to the skillet to get everything warmed through and for it to reduce a bit more.  Once warmed through the chicken was turned over in the sauce and then put skin side up on a rack over a sheet pan, the rack was then put in a 400°f oven for a few minutes for the teriyaki glaze to set.

The chicken turned out pretty well.  I would have preferred to finish it over charcoal or even in the pellet grill to get some wood flavor on it but the weather gods had other ideas.

I used low sodium soy sauce this time by request, but I think it turns out better with the regular stuff.  When I made this chicken previously it turned out WAY too salty, but I think that was because I used a bottle of soy sauce that had been in the back of the pantry for a long time and had concentrated quite a bit due to evaporation.  Next time I'll just buy a new bottle of good soy sauce.
 Simmering the sous vide cooked chicken in the reduced purge from the bags helped heat everything through quicker and resulted in a nice, sticky glaze on the chicken thighs once they were put in the oven to set.  I used a lower temperature for the water bath than I had seen suggested on line (163°f vs. 167°f) so I wasn't too worried about overcooking the meat during the finishing process.  I probably could have gone with a bit of a higher temp in the water bath to get a more traditional texture in the finished product but the lower temp/longer cook helps ensure the chicken stays nice and juicy.


Tuesday, July 9, 2019

Pellet Grill Pepperoni Pizza


One of the ways I'd seen people using their pellet grills was as a pizza oven so I wanted to see how using it for usual pizza recipe would affect the final product.  I started with my usual dough recipe, which is supposed to be a clone of Mellow Mushroom's dough.   finally had a chance to eat at one of their restaurants when I visited family in Florida in June and decided to make a few changes to see if I could get a bit closer.  First thing is that their dough seems to have less molasses than mine so I swapped out half of molasses in the recipe with honey, that seemed to work out well.  The other thing I did was try to use up some 00 flour I had from when I tried a clone of Roberta's Pizzeria dough recipe, that didn't turn out as well.  I replaced about 1/2 of the regular bread flour with 00 flour and made the dough as usual.  After kneading, portioning and rounding I coated the dough balls with oil and put them in the refrigerator to cold-ferment for 2 days.  On the day of the cook a dough ball was removed from the refrigerator and allowed to sit (covered) at room temperature for ~ 90 minutes to come up to temp, when you form cold dough in to skins and bake them off you end up with huge bubbles so tempering the dough is critical.  I then set up the Camp Chef pellet grill by placing a pizza stone on the grates and filling the hopper with Treager Signature Blend Pellets, I thought the blend would work better than the cherry pellets I had used for the pulled pork cook a few weeks earlier.  About 30 minutes till cook time I turned on the pellet grill and turned the dial to 11 (the dial says "High" but I read that as "11").  The temperature at high got up to around 465° which is close to the temperature I use for this particular dough in the inside oven.  Now it was time to form the skin and get the pizza ready for the grill and it was here that I learned that the 00 flour I had wasn't the same as the 00 flour I had used for pizza dough in the past.  The dough didn't have a lot of gluten development so stretching it out by hand resulted in the dough tearing, I eventually had to settle on rolling it out with a pin.  Once I finally got the skin stretched out it was placed on parchment paper which was trimmed so it wouldn't overhang the pizza stone and placed on a pizza peel for dressing. 
Toppings were kept simple, sauce I had on hand, whole milk mozzarella and pepperoni on top.  I wasn't sure how long this would take to cook properly so after loading the pizza on to the atone and closing the lid I set a timer for 5 minutes and waited.  After checking and seeing it wasn't nearly done I repeated checking after 5 minutes until the cheese on top was beginning to brown, took a total of ~ 15 minutes.  After removing the pizza and putting the pellet grill in to shutdown mode it was tie to eat!


 With the exception of the dough not being up to snuff the pizza was really good, the smoke flavor was there but not overwhelming.  Next time I try this I'll keep the 1/2 molasses and 1/2 honey change to the dough but use all bread flour instead of cutting it with 00 flour (unless I can find some locally that specifies it's for pizza).  That should allow me to stretch out the skin the way I like with a really thin center with a good puffy edge.  The bottom of the crust was a little over-browned for my taste, but not burnt.  Rather than just letting the top brown from heat radiated down from the grill lid I may break out my Searzall next time and use it to brown the top once the bottom of the crust is cooked to my liking.  Lots of room for experimenting here!


Tuesday, June 4, 2019

First cook on the Camp Chef PG24 DLX Pellet Grill

This past weekend was the first day since being cleared to eat regular food again (due to dental surgery) and with no rain forecasted so I took the opportunity to finally use my new Camp Chef PG24 DLX Pellet grill.

A few days earlier I had stopped by the local grocery store and found whole pork shoulder butts on sale so I grabbed one of those and a salmon fillet for the non-carnivores in the house.  The rub was made with whatever I could find in the cupboard, mainly kosher salt, coarse ground black pepper and paprika with brown sugar, garlic powder, onion powder, ginger powder, chipotle powder and cayenne pepper.  Very early in the morning I debagged the pork shoulder, patted it dry and coated it with yellow mustard, then liberally encrusted it with my rub mixture.  I let that sit while I set up the smoker.  After adding what I thought were enough pellets I set the dial to "Hi Smoke" and turned on the power, once the smoke started and I knew the pellets were lit and could close the lid to wait for everything to reach temp (Hi Smoke is ~ 220°f).  At around 5:30 am the pork butt was loaded on to one of my old Bradley Smoker racks for easy transport and placed in the pellet grill, the temperature probe that came with the pellet grill was plugged in and inserted to about center mass of the pork.  By pressing a button on the controller to have it display the probe temperature instead of the chamber temp it was easy to keep an eye on things from inside the house.  I let it go on the Hi Smoke setting for about 3 hours spritzing occasionally with a mixture of apple juice and apple cider vinegar before turning the temp up to about 250°f.

About this time I added the salmon fillet seasoned with a little of the rub and topped with thinly sliced lemon, I didn't want the skin sitting directly on the rack so it was placed on a piece of parchment paper before being loaded in the smoker.  I was looking for an internal temp of about 135°f.  When the salmon was done the internal temperature of the pork but was around 160°f so it was time to wrap, it was placed atop pieces of aluminum foil with some extra rub, butter and honey added before wrapping it up tightly, returning it to the smoker and reinserting the temperature probe.  Now it was just time to wait until the internal temp came up to 205°-210°f.  At one point the flame went out because I hadn't added enough pellets to the hopper at the beginning, but this was caught quickly and I was able to get things started before things had a chance to cool down.  Total cook time was 11-12 hours.

After letting the pork butt rest for ~ 20 minutes it was removed from the foil and pulled, the accumulated juices from the foil were added to some store bought BBQ sauce and reduced down a bit before being mixed in with the pork.  Pulled pork sandwiches were served with hot pickles and mustard slaw, I also made a huge mess because I thought making hush puppies would be a good idea.  The salmon also turned out excellent.

Some observations about the cook:  The Camp Chef produces thin, blue smoke for the most part which from my understanding is what you want to see and is probably more appealing to my neighbors than the acrid white smoke my electric smoker produced.  The pork butt had a distinct smoke ring, but the smoke flavor was less pronounced than what I got from the electric smoker I had been using for the past several years (which was a little too harsh in my opinion).  I may look in to getting a Pellet Smoker Tube for future cooks which is supposed to help increase the smokiness, but first I'll probably just try not wrapping the meat for the last half of the cook.  Adding some hickory pellets will also result in more smoke flavor than just using the cherry I had for this cook.  So far I'm enjoying this pellet grill, not sure what I'm going to do next but seeing as how it can be used as an outdoor wood burning oven I'm thinking I'll throw on a stone and see how my standard pizza recipe works out on the new grill.

Thursday, May 23, 2019

It's Here!: Camp Chef PG24 DLX Pellet Grill.

Right now on out patio we have a huge Front Avenue (by Charbroil) propane gas grill that hasn't been used in years, a really old built in Ducane natural gas grill that's small and underpowered, my Bradley Smoker and my Weber Kettle Grill.  Since it's just the two of us now I haven't needed to use the big Front Avenue Grill for years, opting instead to use the charcoal grill.  I've enjoyed my smoker over the last few years but began looking in to pellet grills after seeing them on TV and reading about them.  The more I looked in to it the more it seemed like I could replace the grills and smoker with one piece of equipment and give us a less cluttered patio.  When Woot.com had a Camp Chef PG24DLX pellet Grill up for a good price I pulled the trigger and ordered.

A pellet grill uses wood pellets as fuel, these pellets are loaded in to a hopper and moved via an auger to a fire pot within the grill.  A computer controls the rate the pellets are moved to the fire pot based on a temperature probe within the cook chamber allowing the pellet grill to maintain a fairly stable temperature throughout a cook with minimal effort.

After a few false delivery attempts (carrier says they attempted to deliver but 1, I was at home both times and 2, video doorbell did not record anyone trying to deliver) the box finally arrived late Tuesday.  The box was in pretty rough shape so I opened it up and didn't see any obvious damage.  It was too late to start assembly by that time so I had to wait until after work the next day.  When I started unpacking all of the parts I found a couple of pieces that were bent, the flange on the smokestack was bent back in several places and the side shelf mounting tabs were severely bent.  I went ahead and started the assembly anyway.  Assembly isn't too difficult, the main body of the pellet grill comes preassembles so all you have to do is attach the legs, some handles, the smoke stack and the side shelf.  Took about an hour or so for me to assemble everything by myself.  I was able to get the smoke stack put on, but the warping in the flange left a few gaps that will probably leak smoke and let water in to the cook chamber if it rains when the grill is uncovered.  The side shelf, on the other hand, was a lost cause.  Neither of the damaged parts makes the
grill unusable, assuming the weather forecast is accurate and we won't have any rain tonight I plan on taking the pellet grill outside and doing the initial firing to burn off any oil residue on the parts and to cure the paint.  The process is to set the grill to 350°f and let it run for 30 minutes at temp.  Once I had finished the assembly I could do I got on to Camp Chef's website and submitted warrantee claims for both the damaged parts, to my surprise I got a response in less than 20 minutes letting me know that they would be shipping out replacement parts asap.  That's pretty outstanding customer service if you ask me, they heard about a problem and rook immediate steps to correct it for the customer.  They also sent me a code for 10% off my next purchase through their website, which I may take advantage of as I'm seriously thinking of adding a sear box to my pellet grill.  Unfortunately I'm currently restricted to soft foods (for the next week at least) so I'll have wait on smoking some ribs, but there may be some smoked salmon in my immediate future!


Friday, May 17, 2019

It's Here!: Breville BOV650XL Compact Smart Oven

Been neglecting this blog for too long and since I have a new toy coming next week I thought I'd get started again.  For the past few six months or so I've been getting back in to reef keeping after a 20+ year hiatus and have been focusing my energy on that.  In my late teens and 20's I was really in to aquarium keeping having as many as 18 tanks set up at once, then I got a job as an aquarist at a public aquarium which effectively killed my joy of the hobby.  After spending all day cleaning exhibits the last thing I wanted to do when I got home was aquarium maintenance.  17 years after leaving that job I finally caught the bug again and jumped back in, though I don't see keeping more than 2 or 3 tanks at a time in my future.  May have to start another blog about that hobby since a lot has changed and I'm having to relearn almost everything.


This wasn't something I planned to purchase.  For some time we've been using a cheap, underpowered, small toaster oven at the house that took a VERY long time to get up to temp and was too small to fit much in besides toast.  A few weeks ago the door spring broke which gave me an opportunity to finally get something decent.  I wanted an oven that would fit in the available space (17-18" wide), has decent build quality and enough power to heat up quickly.  After spending a week or so reading reviews I finally settles on the Breville BOV650XL Compact Smart Oven.

At 17" across it is small enough to fit in the space with some room to spare to allow heat to dissipate, it's also much deeper than the old oven which allows it to fit a 12" frozen pizza with ease.

The oven has 8 modes...Cookies, Reheat, Pizza, Bagel, Toast, Bake, Broil and Roast.  The rack has 3 different positions it can be placed in depending on the mode you will be using, the positions for each mode are printed on the oven door.  Once you set the mode with the top dial the bottom dial is used to set the parameters which will vary depending on the mode, for toast you select the number of slices and desired darkness and the oven will set the time.  The quartz elements heat up and cool down much quicker than the resistive elements found in cheaper ovens so the smart oven can maintain proper temperature much better than the resistive elements found in cheaper toaster ovens preventing the top or bottom of the food from becoming over-browned.  Other than the pizza, (which turned out pretty good for a frozen pizza) we've mainly used the toast, broil and reheat modes.  I recently picked up a small cookie sheet that will fit in the oven so we'll be trying out the cookie mode soon and I'm sure I'll be trying out the bake and reheat modes as well.  So far we've been very happy with this oven and hope the high price reflects good build quality that will mean this oven will continue to work for years to come.


The incoming toy is a Camp Chef PG24DLX pellet grill (I got the black one instead of the bronze), I'm planning on using it to replace my big, old gas grill that we never use anymore and the Bradley Original Smoker I've been using for the past few years.  The pellet grill is due to arrive next week but I'm restricted to soft foods until after Memorial Day so it'll probably be June before I really get a chance to play around with it and post a review.

Tuesday, September 25, 2018

Vacmaster VP215 6 week Check-in

I had the Vacmaster VP215 chamber sealer for about 6 weeks and have been using it quite a bit for vacuum compression and sealing up proteins for cooking sous vide.  I generally buy meats in bulk, season, seal and throw in the freezer, when it's time to cook I just pull them from the freezer and put them right in the bath.  Depending on the thickness of the protein I'll generally add 30-45 minutes to the total cook time and I'll usually throw it in the bath while it's still heating up.

I have been thinking about the best settings for various items and have found some resources online to point me in the right direction.  Vacmaster has a chart online that gives recommended vacuum, seal and cooling times for several models of the sealers, it can be found here.  For the VP215 is recommends a 30 second vacuum time for meat, fish and poultry, 20 seconds for fresh fruits and vegetables and 15 seconds for soups.  Out of the box the VP215 has a default setting of 40 seconds vacuum time, for some reason mine started out at 60 seconds.  The seal and cooling times depend on the thickness of the bags you're using, the chart doesn't indicate what types of bags the times are for but they're what I use for 3 mil bags.  Thicker bags and bags made of other materials (like Mylar) may require adjustments to the settings.

Dave Arnold from Cooking Issues and his company Booker and Dax (Searzall, Spinzall) wrote an interesting piece back in 2009 about an experiment he did where he compared the results of vacuum sealing three different proteins ate 5 different vacuum levels with and without oil in the bag for chicken and fish and oil in the bag for all steak samples, the article can be found here.  The vacuum levels he used were  90%, 98%, 99%, 99.9% and 99.9% + 15 seconds of vacuum and each vacuum level had one with and one without oil in the bag.  All  bags of each type of protein were cooked at the same time and temperature and in each case the one sealed at 90% vacuum with oil was the preferred product.  The VP215 only allows you to set vacuum by time rather than % vacuum so I'll have to do some playing around to try and get appropriate times to achieve 90% vacuum with and without the filler plates in place.

EDIT 9/27/18:  Was vacuum sealing some bacon last night to sous vide and played around with the vacuum times, with both filler plates in place it took 15 seconds to achieve ~90% vacuum.  That does leave a little bit of air in the pouch so floating was an issue.  The pouch sealed with 30 seconds of vacuum time looked to be 98-99% vacuum and did not need to be weighted down.  I'll probably stick with 30 seconds to package meats just so I don't have to worry about them floating during the cook.

Like I said at the beginning I've been doing a lot of vacuum compressing since getting the VP215 and have really enjoyed the results with honeydew melon and watermelon.  Recently someone suggest trying pineapple sealed with a little rum and it was fantastic!  Next time I try it though I may add a pinch of salt to make the flavors pop.  Might also be interesting to all some coconut to the mix to try and get a piña colada vibe.

Friday, August 10, 2018

It's Here: Vacmaster VP215 Chamber Vacuum Sealer eidtion.

This is one I've been waiting for for a long time!  For the last year I've been saving up my Amazon credit card points and gift cards with the intention of buying a chamber vacuum sealer.  The Vacmaster VP215 was my first choice.  One of the primary things I was looking for was a chamber sealer with a oil vacuum pump rather than a dry piston pump, an oil pump requires some maintenance (changing the oil after a certain number of hours of use) but the payoff is that it will last much, much longer.  Last week while doing my regular price checking I saw a newer brand/model of chamber vacuum sealer called a Vac-Vida VS301 that seemed to have specs very similar to the Vacmaster VP215 but for only $625.  I seriously was considering buying one but there were a few red flags.  The first is that when running the Amazon reviews through Fakespot.com it came with an F rating for review reliability.  This is a pretty niche product and there were only 5 reviews at the time so everything could be on the up and up, but it was enough for me to take a step back and ponder things for a bit.  The other thing that caused me to hesitate is the complete lack of user reviews online, but I did see in a Reddit thread (now deleted) that the manufacture only started selling these in June so it could be that there hasn't been enough time for units to get in the hands of enough customers for user reviews to start showing up.  In any event, while I was trying to decide if I wanted to take the risk of buying an unproven chamber sealer or wait to have enough to buy my first choice a seller put up some Vacmaster VP215 chamber sealers on sale for $670.  Not Prime, but free shipping so I pulled the trigger and bought one!

So here is my new chamber vacuum sealer.  First off, this thing is HEAVY!  FedEx had the crate at 106 pounds.  Delivery was a bit unusual...first day they said it would be here I took a 1/2 day off work but they just didn't show up.  The next day I waited and waited and waited, then at 7:30 pm tracking went to the dreaded "Pending" so I figured it was delayed again so I got ready for bed (I get up at 4:30am for work), then the doorbell rang just before 9:00 pm.  f course I just go to sleep when there was a new toy sitting in a box downstairs so I decided to at least get thing set up.  I had watched a lot of videos on YouTube prior to ordering this so I knew what needed to be done in order to get the VP215 ready for use.  After unboxing and lugging it upstairs I removed the back cover, unscrewed the oil fill cap and added vacuum pump oil until it came up to just over 1/2 way on the sight glass.  Once the cap and back cover were back in place I moved it to its permanent (at least for the time being) home and plugged it in.  It was late by that time so I didn't have time to really play around but I had some slices of watermelon, honeydew melon, cantaloupe and pineapple ready in the fridge so I decided to try some fruit compression.  This process involved putting the fruit in a strong vacuum for 60 seconds then sealing it in a vacuum bag.  During the vacuum phase the pressure is so low that water in the fruit will start to boil at room temperature, this disrupts cells and when the bag is sealed and the chamber pressure goes back to normal the fruit will be compressed.  This leads to some interesting changes in texture and appearance.

As you can see in the picture, the watermelon slice that has been vacuum compressed is much darker than the one that hasn't been processed, it also has a much firmer texture and is "juicer".  The process also makes the fruit more translucent, this was most evident in the case of the honeydew melon, it ended up being clear enough that you could see your finger through it when picking it up.  The only other thing I've done since then is vacuum compress some strawberries with some of the strawberry juice I clarified recently with my Spinzall.

Some final thoughts...

The advantages of a chamber vacuum sealer over a standard edge sealer (like a Foodsaver) is that it pulls a much stronger vacuum, it allows you to seal liquids (or very wet items), you can do vacuum marinating, instant pickles and the bags are far cheaper than the textured ones required for edge sealers (Foodsaver quart bags are a little over $0.40/bag, Vacmaster 8" x 10" 3 mil bags are under $0.05/bag or less if you buy in bulk).  The edge sealers have the advantages of being much cheaper and more portable.

I've been keeping an eye out for reviews of the Vac-Vida VS301 and it has occurred to me that the layout of the vacuum gauge/indicators/control panel on the VS301 is almost exactly the same as it was on the old model of the Vacmaster VP215 when they had user selectable seal temperatures.


A couple of new knives

I've been trying to build by collection of good quality knives lately and have added a few more.

The first is a ZHEN Japanese VG-10 67-Layer Damascus Steel Vegetable Usuba/Nakiri Hollow Ground 6.5 inch Knife/Cleaver.  This is the same manufacturer that made the Damascus vegetable cleaver I bought last year that I liked so much.

This is a pretty light knife with a thin blade.  It has a full tang, is well balanced and the handle is comfortable to hold.  The handle is made of Pakkawood, which is an engineered wood/plastic composite material.  The blade has a very slight curvature to it so it is better for a chopping motion than a rocking one.  I've found that it is excellent for tasks like slicing onions and other soft vegetable prep.  It is exceedingly sharp and the hollow edge helps the cut food fall off the knife rather than sticking to it.  If you're in the market for a Nakiri style knife this is one you may want to consider.


The second new addition to my collection is a DALSTRONG Kiritsuke Chef Knife - Shogun Series - AUS-10V - 8.5" (216 mm) - Sheath.  This was kind of an impulse buy on Prime Day last month.

 Like the Zhen nakiri and vegetable cleaver this knife is made of Damascus steel, I'm a fan of the patterns created by the layering of the steel.  This knife is much heavier than the nakiri and has more of a curvature to the blade so it can be used in a rocking or chopping motion.  Like the others it has a full tang with a triple riveted handle.  The handle itself is made of G-10, which is a glass based epoxy resin laminate.  It's also well balanced and the heft of the knife makes it easier to get through harder vegetables.  The blade on this knife is ground to an 8-12° bevel so it is stunningly sharp, I dropped a plum tomato on the blade from ~ 9" above and it sliced it in two by gravity alone!  I've kind of run out of space in my knife blocks so this will probably be my last acquisition for a while, if I see something else I want to get I'll have to first put some of my other, less used knives in storage or get rid of the altogether.  It's still good to have some cheaper knives on hand for people who don't tend to take care of nice knives properly.


Tuesday, May 29, 2018

Cue-Vide Baby Back Ribs

For Memorial Day this year I wanted to try something a little different and combine two cooking techniques that I frequently use, smoking and sous vide.  My local grocery store had baby back ribs on sale for the holiday weekend so I bough a rack and went about trying to plan my cook.  After doing a web search figure out time/temps for baby backs I settled on 149°f for 24 hours.

After removing the rack of ribs from the cryovac packaging they came in they were rinsed, cut in two (so they'd fit in my 12 quart Cambro) and the membrane removed by loosening a bit with a skewer, grabbing it with a paper towel and peeling it off.  For the rub I mixed the remains of two types of commercial rubs I had in the pantry from last season, Bad Byron's Butt Rub and McCormick's Brown Sugar Bourbon Seasoning in roughly equal portions.  I filled up a 12 quart Cambro container to the 10 liter mark, attached my ChefSteps Joule circulator, put on the lid I had cut to fit the circulator and used the Joule app to set the bath temp to 149°f.  While the bath was heating I liberally applied the rub mix to the ribs and vacuum sealed them with a FoodSaver.  Because this was going to be a long cook I double bagged the ribs, first each 1/2 slab was vacuum sealed in individual 8" wide bags then those were put in to an 11" wide bag and vacuum sealed again.


Ribs tend to float in the bath so I used a couple of large, stainless steel spoons to weigh down the bag during the cook.  Once the bath was at temp and the ribs added I set the timer on my Joule app for 24 hours and just let them soak, checking back occasionally to make sure the bag was still fully submerged and repositioning the spoons when needed.  The cook was started on Saturday and when the timer went off on Sunday we were on the other side of town.  This is when wi-fi connectivity comes in handy, when the timer went off I was able to lower the set temp of the bath down to 130°f remotely so the ribs wouldn't overcook and get mushy by the time I finally made it home a few hours later.  The ribs were removed from the bath and chilled overnight.


On Memorial Day morning I grabbed my Bradley Smoker from the storage shed and hooked it up using my homemade PID controller set to 250°f.  There were still a few pecan bisquettes left in the hopper so I left those and added some Jim Beam bisquettes on top.  The ribs were added once the chamber temp got to 225°f, below are some baked beans with a little diced onion, green pepper and garlic added.  After an hour on smoke the ribs were sauced with a bottled barbeque sauce (Simple Truth Barbeque Sauce) that I doctored by adding a little balsamic vinegar from Old Town Oil and some of the rub mix.  The ribs were put back on the smoker for about 20 more minutes for the sauce to set.

After bringing them in the ribs and beans were put under the broiler for a few minutes to get a little char on them and to make sure the sauce was nice and set.


Here are the ribs after cutting, they're extremely juicy and tender.  Easy to bite through, as close to the "perfect bite" I've seen on barbeque competition shows as I've ever been able to do at home.  I was concerned that putting rub on at the beginning would make the finished ribs too salty, but that was not the case.  They had just the right salt level and the flavors of the rub permeated the meat.

The final plate, next to the ribs are the smoked baked beans, gochujang coleslaw (bagged coleslaw mix with a dressing of mayonnaise, gochujang, sherry vinegar, celery salt, salt, shichimi togarashi, minced dry garlic and minced dry onion) and a Caesar salad.  

Tuesday, May 15, 2018

Refinement of Chicago deep dish pizza recipe

I've been making some modification to the Chicago deep dish pizza recipe I posted about quite a while ago, the main issue I had was that the dough was a bit too slack and wouldn't stay pressed up against the side of the cast iron skillet i use in place of a dedicated deep dish pan like I used to have.  Here is the new dough formula:


AP Flour    340.0g     100.0%

Water        180.0g      52.9%
Oil              80.0g       23.5%
IDY            9.0g         2.6%
sugar         4.0g         1.2%
salt             6.0g         1.8%

I used olive oil for this since that's what I had on hand, a 90/10 mix of corn oil/EVOO would be preferred as that imparts more of a buttery flavor.  All ingredients were placed in the bowl of the stand mixer fitted with a dough hook and mixed for 1 minute on low.  The bowl was covered and the dough allowed to autolyse for 15 minutes before being placed back on the mixer and kneaded for 2 minutes.  The dough should be allowed a long, warm fermentation to develop the best flavor (4-6 hours at room temp), but I didn't have time for that so I put it in the fridge until I could use it the next day.  

For the sauce I also used a new recipe...

1 28 oz can crushed tomato
1/2 TB kosher salt (Morton)
1 tsp sugar
1 tsp balsamic vinegar (good stuff from Old Town Oil)
1/4 tsp granulated garlic
1/4 tsp celery salt
1/4 tsp red pepper flakes

Mix well and allow to sit for at least a few hours for the flavors to meld.

The dough was pressed in to and up the sides of the oiled skillet.  For toppings I used Italian sausage from Bari Finer Foods, pepperoni, onions and green peppers then covered with the sauce and a sprinkling of romano cheese.  The oven was preheated to 425°f with a baking steel on the bottom rack.  The pizza was baked for 30 minutes on the middle rack, then moved  down to the baking steel for another 10 minutes to make sure the bottom crust was cooked through and the broiler turned on for the last 2-3 minutes.


This pizza turned out much better than the one I posted about in July 2016.  The dough on the side didn't slump down, but I still think a little lower hydration would be in order.  The sauce was something I made up on the fly and I was really happy with it, hope I didn't forget any of the ingredients I used but I think the recipe above is complete.  

Tuesday, January 9, 2018

uKeg 64 Pressurized Growler

It's been a while since I last posted but if I keep my New Year's resolution to cook more meals at home I'll hopefully have some interesting things to share this year.  For the first post of 2018 I wanted to share what is probably the best Christmas gift I received this past Christmas, a uKeg 64 ounce pressurized growler.


This is basically a double-wall insulated 64 ounce growler with a tap.  It has a built in regulator in the cap that uses standard soda charges to pressurize the growler with CO2 (came with 2 8 gram cartridges) to keep the beer fresh and carbonated.  So far I've only filled it up once, Illinois law only allows your to get growlers filled at breweries so I went to the newly re-opened Goose Island Brewhouse on Clybourn.  No problem with the filling, but there was a bit of leakage on the way home which was probably due to the bartender not tightening the cap enough.  Growlers have to be sealed at the bar for it to be legal to take off premises, they usually use a shrink-plastic collar but in this case they just used masking tape.  There's a locking mechanism on the tap handle to keep it from opening when you don't want it to, like while driving home from the brewery.  From what I've heard the insulted growler will keep beer cold for up to 8 hours and if refrigerated and charged with CO2 it'll keep fresh for up to a month, not that I'll ever let 64 ounces of beer sit for that long.  Besides filling it with fresh beer from a brewery it should also be good for filling up with canned/bottled beer when I'm up on the computer and don't want to run downstairs to the beer fridge for a refill, that'll let me test how long it can keep something cold.

Friday, September 15, 2017

It's Here!: Spinzall Edition.

Yesterday evening my Spinzall arrived!

 The Spinzall is the latest product from Dave Arnold's company Booker and Dax, makers of the Searzall torch attachment.  It is the first centrifuge designed for the home cook.  Late last year Booker and Dax launched a crowdfunding campaign at Modernist Pantry to fund the tooling and initial production run and since I'm a bit of a gadget hound I jumped in.  The delivery was made in the evening while I happened to be at the grocery store so I picked up some fresh basil and a neutral flavor vegetable oil so I would have something to play with.  After unpacking the Spinzall I cleaned all the parts that would contact the food with hot, soapy water, rinsed well and allowed to dry while I finished reading through the instruction book.  For the first trial run I cooked some whole garlic cloves in about a cup of the oil until they started turning brown, then turned off the heat and added another 3/4 cup of room temperature oil to stop the cooking.  I cooled the oil further by placing the bottom of the saucepan in cold water, then put everything in a blender jar with about 1/2 cup of fresh basil leaves and blended on high for about a minute.  After reassembling the Spinzall the basil/garlic/oil mixture was poured in the rotor, the lid and bowl locked in place and the timer set to 15 minutes.

In the video below I had left the cap off the feeder, so it's a little louder than normal.  I also may not have one of the fins in properly.


I should have taken a photo of the basil oil before spinning to show all the particulate matter it contained, but here is the final product.  Some of the bits came loose while I was removing the rotor from the bowl and the fins from the rotor, but they could have been easily filtered out if I had bothered.  Definitely could have used more basil and there are probably some enzymes I could use that would break down the leaves more.  I ordered the Spinzall Pre-Treatment Starter Kit from Modernistpantry.com this morning so hopefully I'll be able to make a better product in the near future.  Videos of different things that can be made with the Spinzall are starting to pop up so I'll be able to explore more possibilities for this piece of equipment.

Friday, September 8, 2017

It's Here: Paragon upgrade kit

I've had my Paragon Induction Cooktop for a while now and have been using it mostly for deep frying.  I know it's capable of doing much more, but I prefer using the gas range for sauteing and an immersion circulator (Nomiku, Anova, Joule) for sous vide.  Recently they offered an upgrade kit that would expand the cooktops abilities so I jumped in.


As noted on the box, the upgrade kit includes a mat, a temperature probe and a sensor module.


After opening the box.  Pretty sparse documentation but all the important stuff about getting the sensor paired to to the cooktop is easy to follow.  So what does the upgrade kit do?  The new mat goes between the cooktop and a pan and measures the temperature of the pan so you can control the surface temperature, this will be very useful for things like shallow frying, tempering chocolate and candy making where you want to bring your sugar up to a specific temperature.  The battery/sensor module is a separate piece that fits in to both the mat and the sensor probe, the original module was an integral part of the probe.  This should make it much less of a hassle to charge it and if something fails you won't have to replace the entire probe assembly.


Here is the mat in action, depending on which mode you're using you'll get some degree of overshoot with an empty pan (especially in "Rapid Mode") but the sensor reading from the mat seems to mesh pretty well with the actual surface temperature reading from my IR thermometer.

One downside of the upgrade kit is that the mat can only go up to 375°f, same as the temperature probe.  That means it probably won;t be particularly for post sous vide searing.  There is a new product coming from First Build called the Tasty One Top that appears to be basically the same technology.  From the description it looks like the surface temperature sensor is built in to the unit rather being a separate mat.  It also will feature Bluetooth connectivity for control via an app, but minimal on-board controls.  It will also have a higher temperature range up to 450°f making it useful for searing.  These are not out in the wild yet (expected shipping date in November) so I have no idea about the quality of the hardware, but may be something to take a look at if someone is interested in this type of technology.

Next week I should recieve my most expensive kitchen gadget yet, a Spinzall home culinary centrifuge.  Once I've had a chance to play around with it a bit I'll post a review.


Labor day dinner

Just wanted to make a quick post about Labor Day dinner this past week.  More of a lunch, we had to go to a funeral that evening so the meal was pretty early.  On the menu was sous vide ribeye steak, air fried potatoes and broccoli puree.


The steak was seasoned with salt, pepper, minced dried onion, minced dried garlic and ground togarashi (found this stuff at my local supermarket and have been using it on everything lately!).  It was vacuum sealed with the trusty old FoodSaver and cooked in a 130°f water bath (heated with my Joule immersion circulator) for about 2 1/2 hours then pressed under a weighted sheet pan for 15 minutes and finally seared in a screaming hot skillet.  The potatoes were first boiled to get the cooking process started, then allowed to dry out a bit before dressed with salt, pepper, togarashi and olive oil and placed in my air fryer to crisp up.  The broccoli was trimmed and cooked in the same water as the potatoes, once tender it was put in a blender with a little of the cooking liquid and pureed.  I added a bit too much water to the broccoli which made the puree little too loose, so I added a few of the potatoes to tighten it up.  All in all a great meal.

Thursday, July 13, 2017

A good quality chefs knife for a cheap price

A few months ago I was reading through a food-themed message board and came across a post about a really cheap chef's knife the OP had found on Amazon.  At the time the Michlentic 8 Inch Professional Kitchen Chef Knife was selling for a mere $12.90 so it was an easy decision to add one to an order.  I've been using it for almost two months now and have been pretty happy with it's performance.


 The knife comes in a black gift box.


In the box the blade is nestled in to a form-fitting compartment with a cutout protecting the blade.  The box feel sturdy and should offer great protection when travelling with the knife.


With the cutout removed.  The knife has a hollow edge blade to help reduce surface tension when cutting through wet foods.


The knife weighs in at just under 186 grams, about 33 grams lighter than my Missen chefs knife I wrote about last year and 26 grams lighter than the Victorinox 8 Inch Fibrox Pro Chef's Knife.


The knife is balanced right at the bolster.

I've found the knife very nice to hold, the pakkawood handle is shaped to fit comfortably in your hand.  The knife was razor sharp right out of the box and I haven't really seen much dulling with use, however I do hone the edge before each use like I do with all my knives to keep them sharp.  I was able to quickly shred a head of cabbage with little difficulty and have used it for a variety of other tasks, although I still reach for one of my sturdier knives when a little more heft is called for.  

The price on this knife has been going up and down quite a bit, when I made my purchase it was $12.90, as of today it is up to $22.90.  It'll probably go up and down a bit more before the price stabilizes, but even at the current higher price I wouldn't hesitate to recommend this knife to someone who wants a good quality knife for a low cost.

Wednesday, May 31, 2017

Snappy Beer Cheese

If you're from Central Kentucky you're most likely familiar with snappy beer cheese, a spicy, flavorful cheese spread that's somewhat unique to the area.  My first memories of the spread are from our family going to Hall's on the River just outside Lexington in Winchester Kentucky.  Our whole  extended family would gather there for dinners several times a summer, and we always had their beer cheese.  Over time Hall's declined (but I'm told has rebounded since I moved away in the 90's) so we found other sources for beer cheese.  For the last 15 years or so a friend of my parents would make large batches of her family recipe beer cheese and sell it to friends in 10 pound buckets, which would then be divvied up amongst us.  She kept the recipe close to the vest, all I know is that she used a spreadable processed cheese and added flavorings.  The standard flavorings are worcestershire sauce, garlic, cayenne (or tabasco), mustard and (of course) beer.

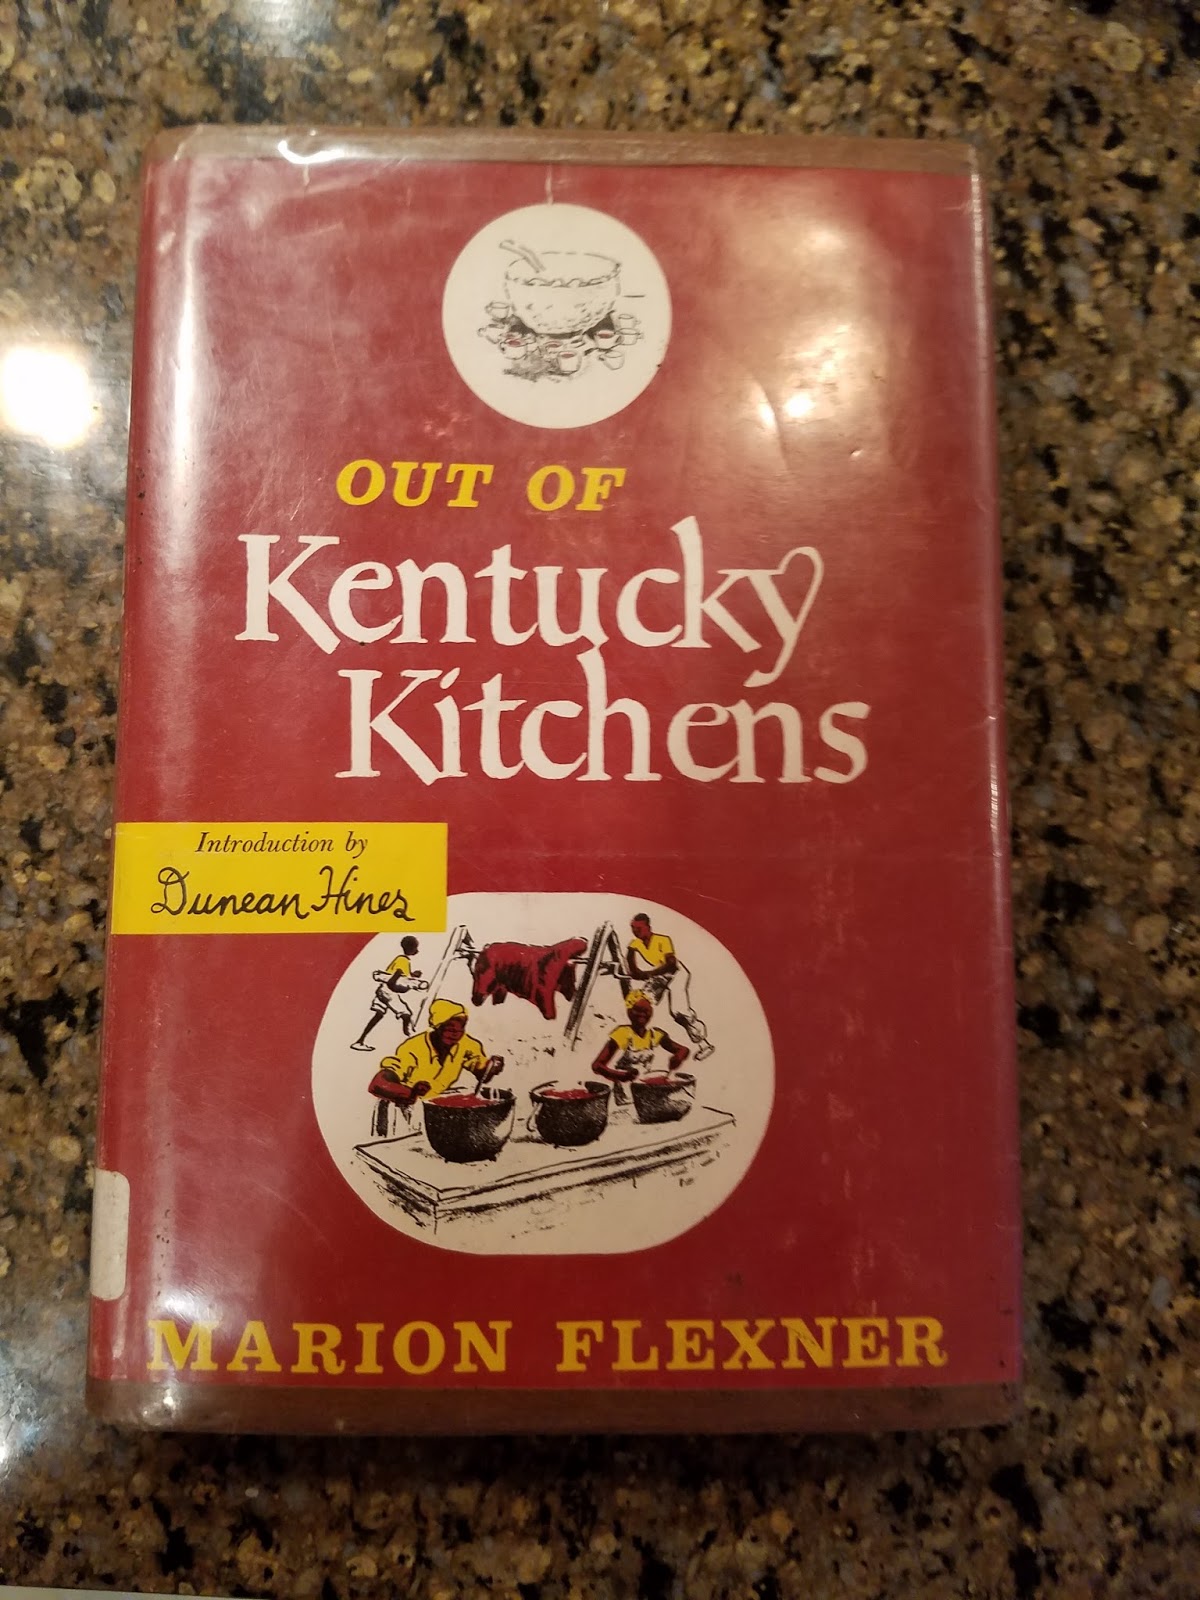
Now that the parents have moved further down south I have to find a new way to get my beer cheese fix.  I've tried a few times to make my own version using spreadable processed cheese, but adding enough beer to make it noticeable resulted in a very loose cheese sauce rather than a spread. Recently I came into possession of a rather old (1949) cookbook of Kentucky recipes (a newer edition can be found here) and while leafing through found a recipe for beer cheese that I had to try.

I ended up making a few changes to the recipe while making it, and made some adjustments later.  What I used was...


8 oz sharp cheddar
8 oz "rat" cheese
1 large clove garlic (grated)
1/2 cup beer (american pilsner)
1 1/2 TB worcestershire sauce
1/2 ts salt
1/2 ts powdered mustard
1/4 ts cayenne pepper  
1/8 ts celery salt                  

I had never heard the term "rat cheese" before, I learned that at the time this book was published it was the common name for young, domestic cheddar, the kind you would use to bait rat traps.  All the cheese was grated and placed in the bowl of a stand mixer to warm up a bit.  The garlic was grated on a microplane and added along with all the dry spices.  The beer was mixed with the worcestershire sauce and warmed up in a saucepan both to get rid of the carbonation and help the cheese become smooth.  I turned the mixer to low and let it blend everything, then added the beer/worcestershire sauce mix and turned the speed up to medium and let it run for a while.  The end result was good, all the flavors were these but it was chunky and a little to stiff for my liking.  A few days later I decided to loosen things up a bit, I mixed another 1/4 - 1/3 cup beer with a 1/2 ts or so sodium citrate in a saucepan and started warming it up, then added the beer cheese and mixed vigorously over low heat until all the cheese melted and smooth.  The result is much closer to the spreadable cheese I remember, but not quite.  It seems to be a very thick liquid that self levels when left alone, next time I'll probably beat more air in to the mixture before packing into tubs.  Still a good starting point and one that I'mm enjoying!