Tuesday, August 16, 2016

Improved Air Fryer French Fries

I've been playing with my Avalon Bay AB-Airfryer100 air fryer quite a bit lately, mostly for cooking frozen items like fries, onion rings and chicken nuggets but also for making french fries from scratch.  The homemade fries turn out good, but they lack the craggly crispy surface that comes from deep frying.  As an experiment I decided to try and damage the surface of the fries prior to cooking to see if I could get my "air fried" fries closer to the real thing.

I cut the potatoes into batons as usual, but before the soak I added a cup full of crushed ice to the bowl, covered with a tight fitting lid and shook the tar out of them for about 30 seconds.  I added enough cold water to cover the fries and let them soak for about 30 minutes, then rinsed thoroughly and patted dry with paper towels.  The fries were seasoned simply with 1/2 tsp olive oil, salt, pepper and paprika (one of the things I like about air frying is that you can season before cooking).  Another technique I played with this time is double cooking similar to what you do when deep frying french fries.  The first cooking was done at a lower temperature, 320°f for 10 minutes.  After shaking the basket I returned them to the air fryer and turned the temperature up to  400°f.  I removed the basket every 4-5 minutes to shake and check for doneness.  After a total of about 20 minutes they were golden brown and crispy.


The end result was a fry that seemed to be a bit crispier than the previous attempts, damaging the surface of the fries before cooking does seem to have created more surface area to get crispy.  The two phase cooking method may or may not have contributed anything to the final product, for my next attempt I'll try single stage cooking combined with the ice shake to see if the results are any different.


Monday, August 8, 2016

LG French Style 3-Door Refrigerator Model LFXC24726S

A little over a month ago our Kitchenaid side-by-side refrigerator gave up the ghost.  At some time during the night the compressor failed, and with the fans still running the temperature quickly rose.  I left work as soon as I was told that something was wrong, but by the time I made it home an hour later the temperature in the freezer section had increased to over 60°.  We ended up having to throw away everything.  The refrigerator lasted for a little over 14 years so I can't complain too much about the build quality, but I found the narrowness of the freezer section a little limiting.  After taking measurements of the cabinet opening we looked around at several options and finally decided on the LG LFXC24726S.  

The refrigerator is a counter depth French door style with a bottom drawer freezer compartment.  The capacity is a little smaller than the one we were replacing, but the space seems much more usable since the compartments aren't as narrow as in the side-by-side model.  A water and ice dispenser are located on the refrigerator door, with a compact ice maker located in the door of the refrigerator section.  The ice bin is accessible by flipping a latch and opening a small door within the refrigerator door, the bin holds about 4.5 quarts of ice when full.  So far we've been pretty happy with the refrigerator, although there is a rattle from time to time that I haven't had time to track down yet.  On another note, I would like to find the architect who thought putting a kitchen on the second floor with the only access being a 36" wide staircase and flog him with a wet noodle.  I'm sure getting major appliances up to the space wasn't that difficult before inconvenient things like walls were put up, but it was a MAJOR hassle to get this puppy up to the kitchen and installed.

I wasn't really planning on posting about the refrigerator, but an event over the weekend made me want to say something.  A fire broke out in a garage about a 1/2 block down the street, it spread to 2 houses and a garage across the alley before finally being doused by the fire department.  One firefighter was treated for minor injuries, but other than him the only damage was to property.  During the course of the fire a utility pole was destroyed and we were left without power.  We didn't know how long the power would be out, so we just decided to keep the refrigerator doors closed to try and keep everything cold until it was restored.  After about 4 hours I became a little concerned about the ice maker in the refrigerator door, I figured I should dump the bin so the melting ice wouldn't make a mess in the kitchen.  When I opened the ice maker door I was pleasantly surprised to find that all the ice was still frozen, it was all dumped in to a bowl which was then put in the refrigerator section to help keep things cool.  It took about 10 hours before the power was finally restored, almost none of the ice in the bowl had melted and the things in the freezer were still frozen solid.  I had been worried that we would have to end up throwing away another entire refrigerator full of food, but the new LG refrigerator is insulted well enough to keep that from happening.  Now I just need to track down that rattle...

Monday, August 1, 2016

Avalon Bay AB-AirFryer100R Air Fryer

An air fryer is a small, counter-top appliance that cooks by circulating hot air around the food at high speeds.  A heating element above the cooking chamber provides direct, radiant heat to the top of the food being cooked, while a powerful fan circulates hot air around the chamber and through the food.  I had heard about these in the past, but never really considered buying one for myself.  Because of my fondness for fried foods I received one as a gift last week for my birthday.

The model I received is an Avalon Bay AB-AirFryer100R.  The fryer comes with a perforated basket for cooking items that would normally be deep fried, like french fries, a solid, round baking pan and a rack.  So far I've only had a chance to use it a few times, once to make fresh cut french fries and again to cook frozen, pre seasoned curly fries from the supermarket. 

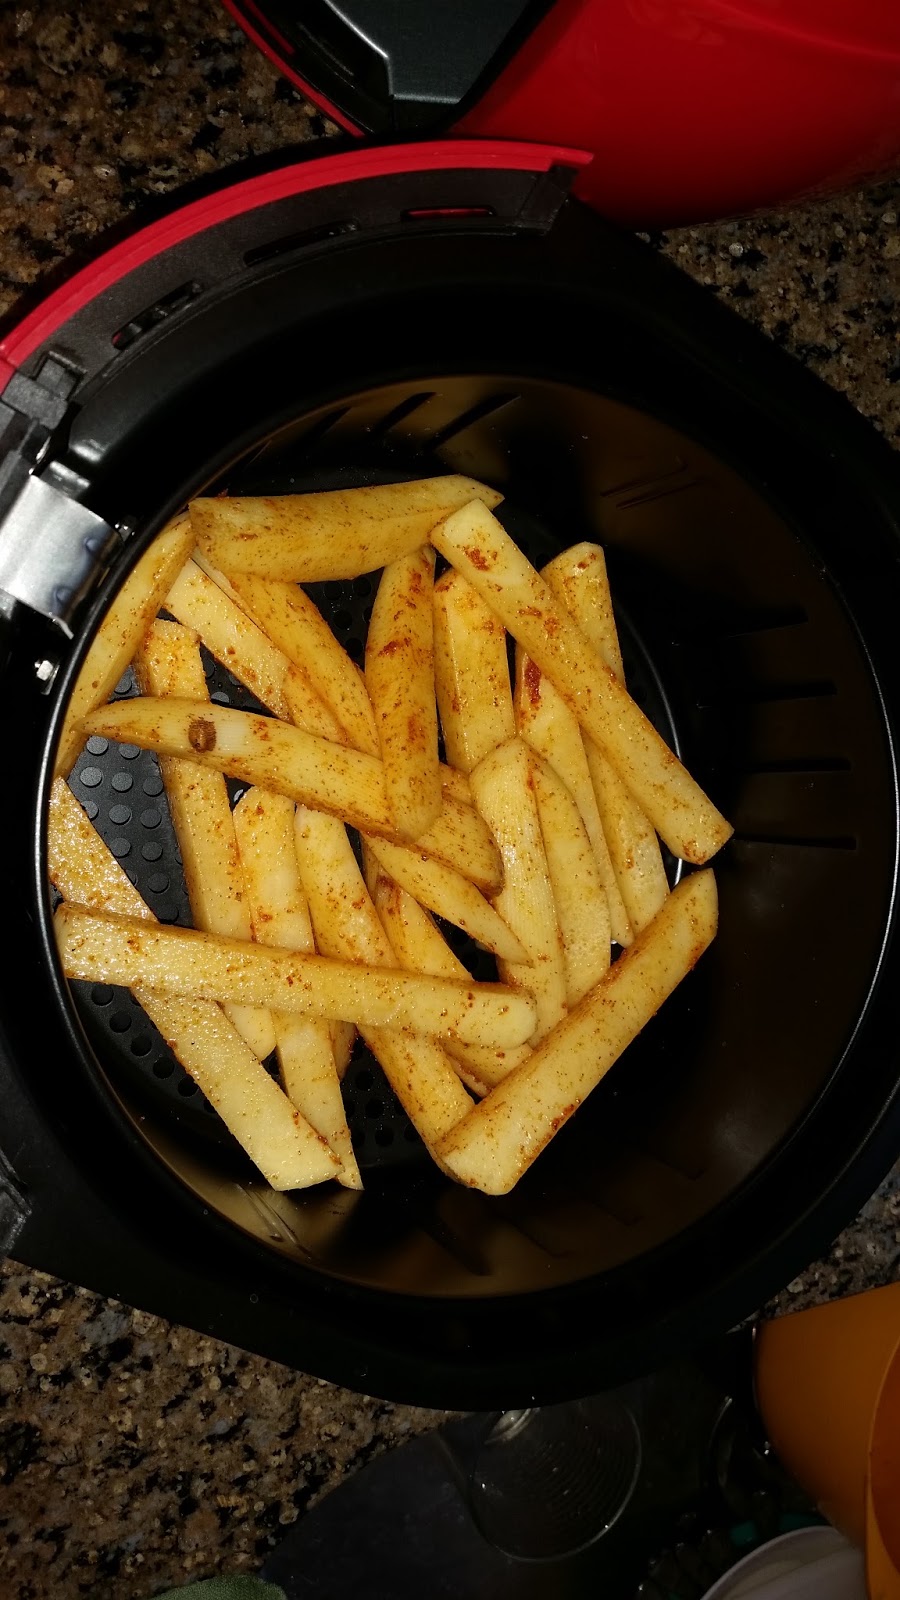
Raw fries with seasonings


Fries in basket after 10 minutes
For the fresh cut fries I took a large baking potato, cut it into batons about 3/8' thick and let them soak in cold water.  After about an hour I dumped the starchy water, rinsed the potatoes , covered them again with cold water and let them sit in the refrigerator until I was ready to use them later that evening.  To prepare the fries for cooking they were drained, patted dry in paper towels and placed in a bowl for seasoning.  For seasoning I used granulated garlic, celery salt, kosher salt, hot chicken spice mix (from my Nashville Hot Chicken post), and paprika.  About 1/2 tsp olive oil was added and everything was mixed together until the spices were evenly distributed.  The fries were put in the basket and the basket inserted in the frye.  The temperature dial was set to 400 and timer set to 10 minutes.  After 10 minted the basket was removed the I shook the fries to turn them over, then the basket was replaced and the timer set for another 10 minutes.  At that time they looked like they needed a little more time so I shook them up again and returned them for another few minutes, total cook time was around 24 minutes, this would be reduced if I had cut thinner fries.


Finished product
The end result was pretty good, the fries had a nice crispness on the outside while the inside was fluffy like a baked potato.  I wouldn't mistake these for good, deep fried french fries, but they were pretty close and much healthier.

For the second experiment I wanted to see how frozen french fries would fare in this air fryer.  I bought a bag of cheap, seasoned curly fries that were on sale at the grocery store.  These were by Mariano's house brand, Roundy's.  I took the fries directly from the freezer and put them in the basket, turned the temperature dial to 400°f and set the timer for 10 minutes.  As before, the basket was removed at that time and the contents shaken up.  The timer was set for another 10 minutes and I pulled the fries out and shook every 2-3 minutes until they were done.  Frozen to done took about 18 minutes.  These turned out really well, very crisp on the outside and moist on the inside with nothing added at all.  I've never been one to keep bags of frozen fries in the freezer, but I think I'll now have to keep some on hand for a quick snack.  Next I'll have to see how frozen onion rings work out...


Frozen curly fries
The air fryer comes apart easily to clean, not that there was much of a mess with what I was cooking this time.  The recipe book that comes with the AB-AirFryer100 has some pretty interesting dishes, from fajitas to brownies.  I'll have to explore it more when I have the time.  Even though I never seriously considered buying one of these I must say that I'm impressed so far with how it works.  I'm looking forward to being able to make faux fried foods without having to go through the hassle of setting up a deep fryer, stinking up the house and having to filter or dispose of quarts of oil.  Obviously there are things that an air fryer isn't suited for, like battered items of falafel, but I can still break out the Paragon cooktop if I really want to indulge in those things.  I assume it would work fine for breaded items, I may have to try some air fried chicken before too long to test that out, or maybe air fried pickles!

Thursday, July 21, 2016

Homemade Chicago Deep Dish Pizza

I've never had a good Chicago style deep dish pizza outside of Chicago.  When I'm visiting friends and relatives in other areas of the country they often want to take me to a local place that serves "authentic" Chicago deep dish, but it rarely delivers.  Most often they just serve a version a pan pizza, a thick crust topped with standard toppings baked in a walled pan.  Chicago deep dish is baked in a similar pan, but has a much thinner crust that's pressed into the pan and up the sides.  For some time I've been experimenting with my recipe for Chicago deep dish pizza, but because I don't want to weigh 300 pounds I have to take it a little slow.  Here is my latest attempt...

The pans used for deep dish pizza are usually made of blue steel and have to be seasoned, I used to have a nice blue steel one like this one from Ottinetti but at some point over the years it was lost.  Blue steel pans have to be seasoned, but once that's done they'll last for years and years as long as you take care of (and don't misplace) them.  Lacking an authentic deep dish pan I opted to just use a large cast-iron skillet.

I used the following recipe for the dough...

300 grams AP flour
174 grams water
70 grams corn oil
7 grams EV olive oil
9 grams IDY
4 grams sugar
6 grams salt

The sugar was dissolved in the water and the yeast sprinkled over top and mixed in.  After allowing that to sit for a few minutes all the rest of the ingredients were added and mixed for about 1 minute.  The dough was then put in the refrigerator overnight.  The next morning the dough was put out at room temperature and allowed to ferment all day while I was at work (about 9-10 hours), my theory on the buttery flavor in good Chicago deep dish dough is that the long, warm ferment allows for the formation of diacetyl which is a component of artificial butter flavor.  When I got home I pressed the dough in to the pan and up the sides.  The dough was a little too slack in my opinion, next try I'm going to cut the oil down by about 25% to try and get something a little easier to handle.


Slices of mozzarella were placed on top of the dough going up the sides, I also had some shredded mozzarella that I put on top of the slices.  Next came Italian sausage (from Bari here in Chicago), sliced onions, pepperoni and green peppers.  All that was topped with sauce and more cheese was sprinkled on top.  Normally the cheese on top would be a combination of pecorino romano  and parmesan but due to a recent refrigerator failure my food stocks are still a little low.

The sauce was simple, just a can of 6-in-1 crushed tomatoes seasoned with a a few teaspoons kosher salt, a clove of garlic (minced), 1 teaspoon of greek oregano and a little sugar to taste.

The pizza was baked at 400°f for 30 minutes, then the oven temp was lowered to 350°f and baked for another 30 minutes.  Once removed from the oven it was allowed to cool in the pan for ~ 5 minutes before being de-panned and put on a brown paper bag to wick away excess oil.

A pizza wheel isn't much use for this type of pie, a long chef's knife can be used but I prefer a rocker style pizza cutter.  The dough cooked well, but the excess slackness caused the edges to be a little thicker than I would have liked, reducing the oil in the recipe (to 50 grams corn and 5 grams EVOO) should remedy this problem the next time.  Flavor was spot on but I might go for a fennel or hot Italian sausage for the next go.  Still a work-in-progress but getting very close to where I want it to be.

Friday, May 27, 2016

Cheap, reusable alternative to bisquettes for a Bradley Smoker

I've really enjoyed my Bradley Smoker over the last year and hope to use it quite a bit this summer now that it's finally warmed up outside.  As described in an earlier post, the Bradly is an electric Smoker that uses compressed wood chip pucks, called bisquettes, to produce the smoke.  Bisquettes are fairly inexpensive (about 3 for $1 from Amazon) but I've had some trouble finding them locally, especially late in the season when places like Home Depot and Menard's have cleared out their grill supplies to make room for snow blowers.  This can be a problem if I forget to plan ahead and don't have a supply on hand when I want to smoke something.  The other thing is that you're restricted to the woods that Bradley decides to make available in bisquette form.

A recent thread on The Hungry Onion about electric smokers got me to thinking about finding an alternative to bisquettes for those times that I may be out or when I want to use something different for smoke than what's available (herbs, tea, other woods etc...).  I started looking around and found these 1 ounce flat metal tins on Amazon (often sold as containers for homemade lip balms) that are close in dimensions to a bisquette (about 3/8" less in diameter and 1/16" thicker) and decided to give them a try.

Here is one of the tins next to a bisquette.  Using the reamer tool on a Swiss army knife  I punched several holes in the lids (ended up with 9 per tin).  I had been saving the left-over wood chips in the bottom of bisquette trays and put about a teaspoon of chips in each tin, closed them up and loaded them in the bisquette hopper.  The test run went really well, the control box advanced the tins down the ramp to the burner plate with zero issues.  Due to the slightly lower diameter each tin ended up spending a total of 40 minutes on the burner plate, half on and half off.  I opted not to fill the catch bowl with water as I figured that could damage the tins or make then difficult to open later for reuse.  When I did open the tins later all of the chips had burned up.  Hopefully I'll be able to fully load the tins with wood chips this weekend and see how they do in an actual cook!


Please keep in mind that the use of these tins as a bisquette alternative is an experiment, try at your own risk!

Tuesday, May 10, 2016

NuWave PIC2 Portable Induction Cooktop

A few days after I recommended the Rosewill induction cooktop that I've been using in the office for over three years, it started making odd clicking noising and giving me a brief "E1" message.  After a few seconds it would start heating but continued to make the clicking noises as long as it was operating.  After removing the casing to see if I could see an obvious cause I just decided it was time for a replacement.  I didn't want to spend too much money since this was going to live in my office, so after a brief search I settled on a NuWave PIC2 Induction Cooktop.


I remember seeing their infomercials on late-night TV and had heard good things about the hardware, but not so good things about buying it directly from them.  Since I have Amazon Prime I just ordered it from there for just under $60.  The PIC2 is a little less powerful than the Rosewill it's replacing, 1300 watts vs. 1500 watts.  For a little more money (about $75) there is the NuWave PIC Pro, which delivers 1800 watts of power.

Upon opening the box I was pleasantly surprised to find that the PIC2 came with a 9" Duralon ceramic coated non-stick fry pan.  I didn't really have a need for another frying pan at the house so it made the trip with the cooktop to live in my office.  The cooktop has six preset levels (Low-100°f, Med Low-175°f, Med-275°f, Med-High-375°f, High-425°f and Max/Sear-575°f) but you can use the controls to set the temperature to anything you want in 1° increments up to 575°f.  The cooktop is also programmable so you can set it to cook at one temperature for a set amount of time, them automatically lower to another temperature for holding.

So far I've only done one test run, I measured out 1 liter of cold tap water (50°f) and timed how long it took to come to a rolling boil using the Max/Sear setting.  This is pretty subjecting since results will vary greatly depending on the quality of the pan being used, and since these stay in my office I'm using the cheapest pans I could find.  It took 5 minutes and 45 seconds for the water to go from tap temperature up to a rolling boil.  This is actually a little faster than it took the Rosewill cooktop to bring 1 liter of cold tap water up to a rolling boil, but that was in a different pan.  Tomorrow will be the first time I use the new cooktop to make lunch, hopefully it'll be as good and last at least as long as the Rosewill did.

Wednesday, March 2, 2016

72 Hour Short Ribs

Short ribs are one of the most transformative dishes you can make using low temperature cooking.  The technique allows you to transform the meat inn to something with the tenderness of tenderloin, but with the full beefy flavor of a tough cut of meat.  The results can vary depending on the time and temperature used, in the past I've gone for 72 hours at 55°C which resulted in pink, medium rare meat which still held its shape when cut.  This time I decided to go with the recipe found in Nomiku's Tender app, which used a slightly higher temperature (60°C) for the same amount of time.


The recipe calls for red wine to be bagged with the ribs, since I use a Food Saver I find the best way to do this is to freeze the wine first so it doesn't get sucked out of the bag while the vacuum is being pulled.  I added a little Worcestershire sauce to the wine and let it sit in the freezer for a few hours until solid.  The ribs were liberally seasoned with salt and pepper, I like the flavor a pre-sear brings to the game so I heated up a skillet with some beef tallow and browned one side of each shot rib.  Once they had cooled a bit I bagged the ribs with the wine cube, a roughly chopped stalk of celery, some carrot, a quartered small onion, two cloves of garlic and some fresh herbs.  The bag was vacuum sealed and placed in a bath with the Nomiku set to 60°C.  I had never used the timer function before so I set it for 72 hours, adjusted the water level and put the lid on the Cambro.  After 72 hours I kind of expected the Nomiku to reduce the bath temperature to 50°C for holding, but instead it just stayed at the 60°C and started counting up.  I set the timer manually, I believe it's possible to have the circulator lower to a holding temperature once the timer counts down to zero but you may have to set it using the Tender app for that functionality.  For a sauce I quartered some crimini mushrooms and browned them along with some onions.  I removed the ribs from the bag, poured the purge through a fine mesh strainer and poured it in to the mushrooms to deglaze the pan.  A sprig of rosemary was added along with a clove of garlic and the liquid was reduced until it became syrupy.  For sides I boiled some new potatoes and steamed some asparagus over them while they were cooking.

The ribs ended up with a consistency like they had been braised, but still nice and pink.  The fat was quite soft and melted away when bitten in to.  I would probably not use the same wine next time, we don;t drink a lot of wine so I used a bit of Merlot from a small single serve bottle I found in the cupboard.  It resulted in an off odor when the bag was opened, next time I'll probably omit the wine and just use some beef stock instead.  Reducing the purge with the mushrooms resulted in a really nice sauce so if I want some wine flavor I'll probably just add it there next time.  With those few tweaks I think this will be a go-to dish.